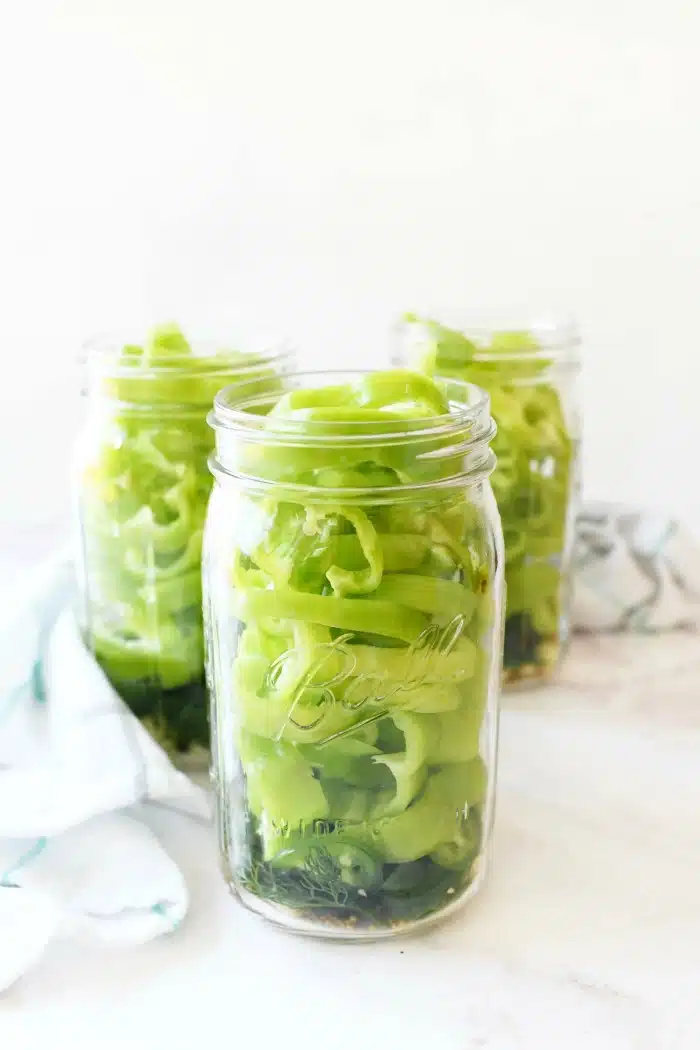
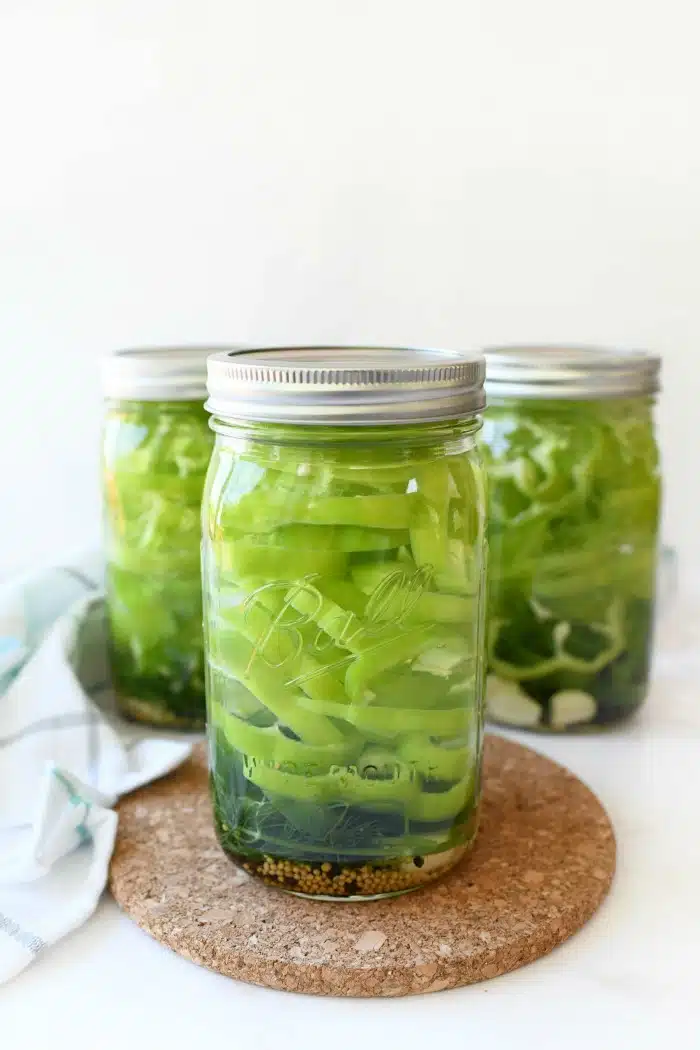
These cold packed, refrigerator peppers are super easy to make and have a gourmet flavor. They are perfect for sandwiches, salads, or for a healthy snack. Ready in 2-3 weeks, these peppers are easy to prepare without any canning knowledge.
Growing up Portuguese, my father and his family would always grow, pickle, and can their own hot and sweet peppers. It was a family tradition to pick pepper bushels, clean, and slice them.
I remember one time I didn’t listen to my father and I touched my face while working with chili peppers–YIKES! There wasn’t enough milk on the planet to soothe those burns. My eyes, mouth, face, fingers–everything was on fire.
But, anyhow, today’s DIY recipe for Homemade Cold Packed Pickled Peppers is slightly different than my father’s method because we are not actually “canning” them for shelf-stable storage. We are simply preparing them for the refridgerator.
Best peppers to use
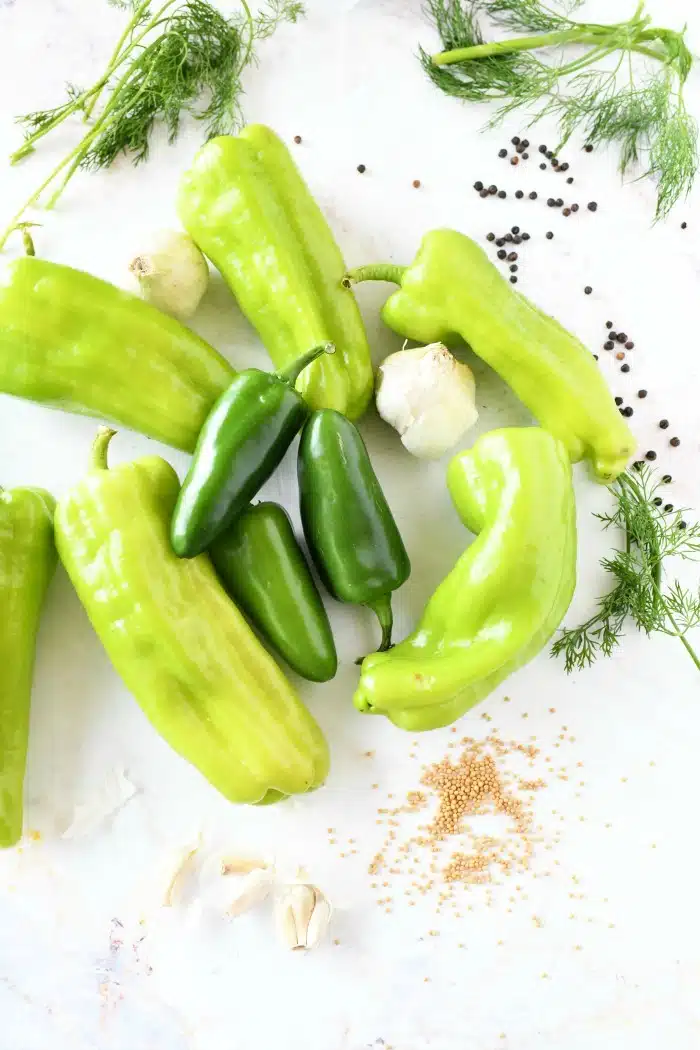
To start, I wanted to briefly touch base on the best peppers to use for pickling. Ultimately, this boils down to how hot you want your peppers to be. For us, we were looking to pickle peppers that could be added to salads, and subs. So, we went for a milder, sweeter pepper and packed them with some jalapenos.
For this batch we used Cubanol Peppers and some Jalapeno Peppers. However, you can also use Banana Peppers, or Chilis. It all depends on how spicy or sweet you want your batch to be. For us, the perfect combo is somewhere in the middle.
Best jars for pickling peppers
Over the years, I have always loved Ball Canning jars for all my pickling needs. I used them in my Cold Packed Pickles Recipe and now recommend using the 1-Quart Wide Mouth Jars. They make adding the ingredients and vinegar a breeze. Of course, if you have another style on-hand that is okay. This is just a matter of preference. Just make sure your jar lids are also clean and new and free of rust or debris.
Even though these peppers are not being traditionally canned, the jars still need to be sterilized.
How to sterilize canning jars
Remove any debris from your cans and wash them with hot water and suds.Place jars in a large stock pot or canning pot (we used our pressure canning pot). Fill the pot and jars with water so everything is covered, and add the lids in. Make sure you only use fresh lids and rims.
Bring pot water to a rapid boil and continue to boil for 15 minutes. Once they are done boiling, remove the pan from the heat and place it on a cool burner. Using canning tongs, carefully remove each jar and place them on a clean towel to dry.
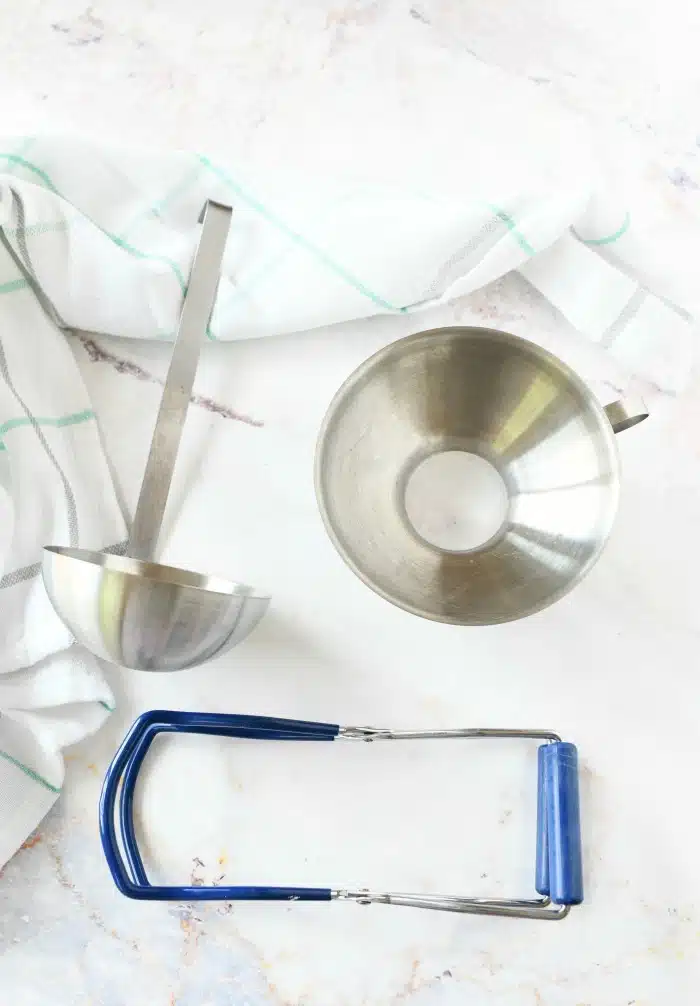
Helpful supplies for pickling peppers
- Large canning pot for boiling glass jars
- GLOVES- a must for working with peppers *do not touch your face or eyes!!!!!
- 1-quart new canning jars, rims, and lids
- Jar lifter (canning tongs)
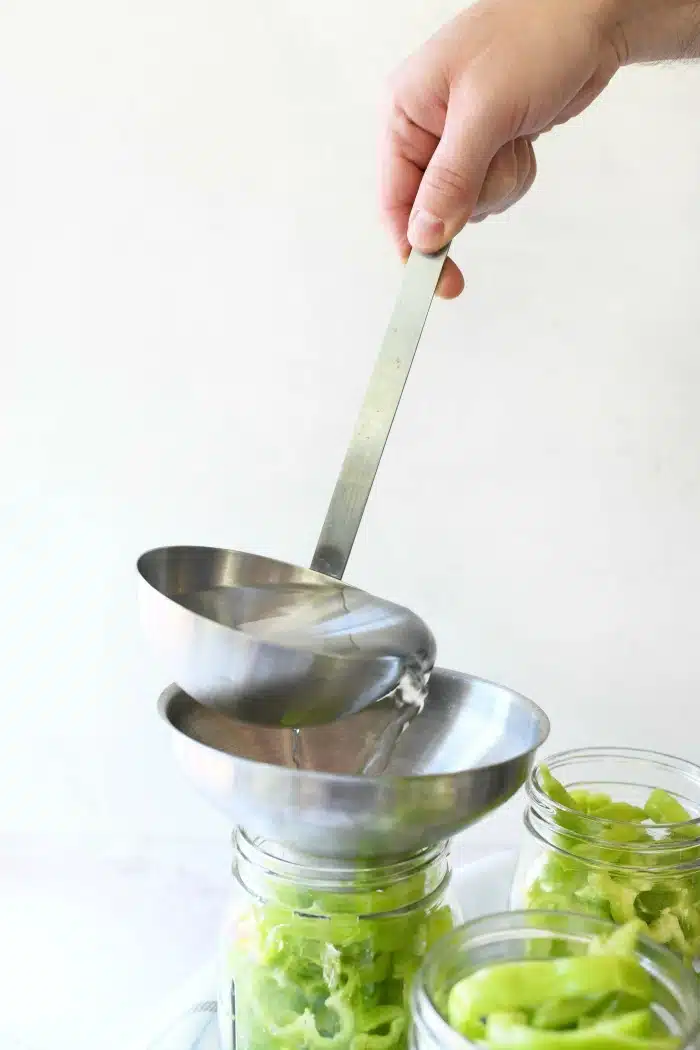
- Jar funnel to add liquids
- Clean towel
- Cutting board
- sharp knife
- 6-quart stockpot for vinegar mixture
- Scrap bowl for composting seeds, and skins, etc.
Pickling juice ingredients
This recipe is for just 3 quart-sized worth of brine liquid. Double or triple to accommodate your jar amounts.
- 1 tsp. pickling salt – You must use this or it could be too salty!
- 8 cups of distilled white vinegar
- 2 tablespoons granulated sugar
- 3 cups of filtered, or spring water for best results
Pickled pepper jar ingredients
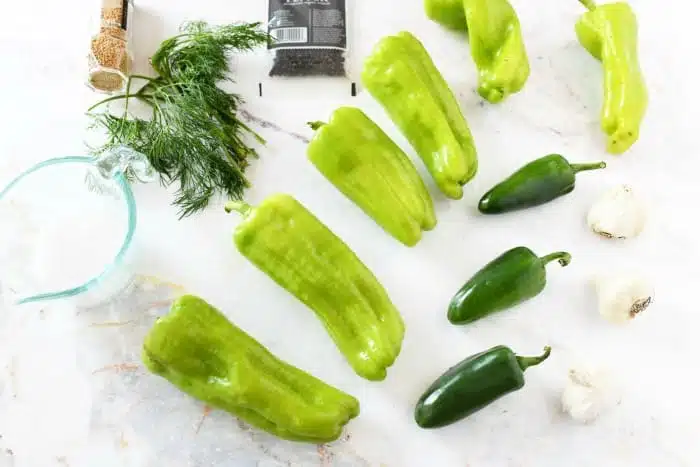
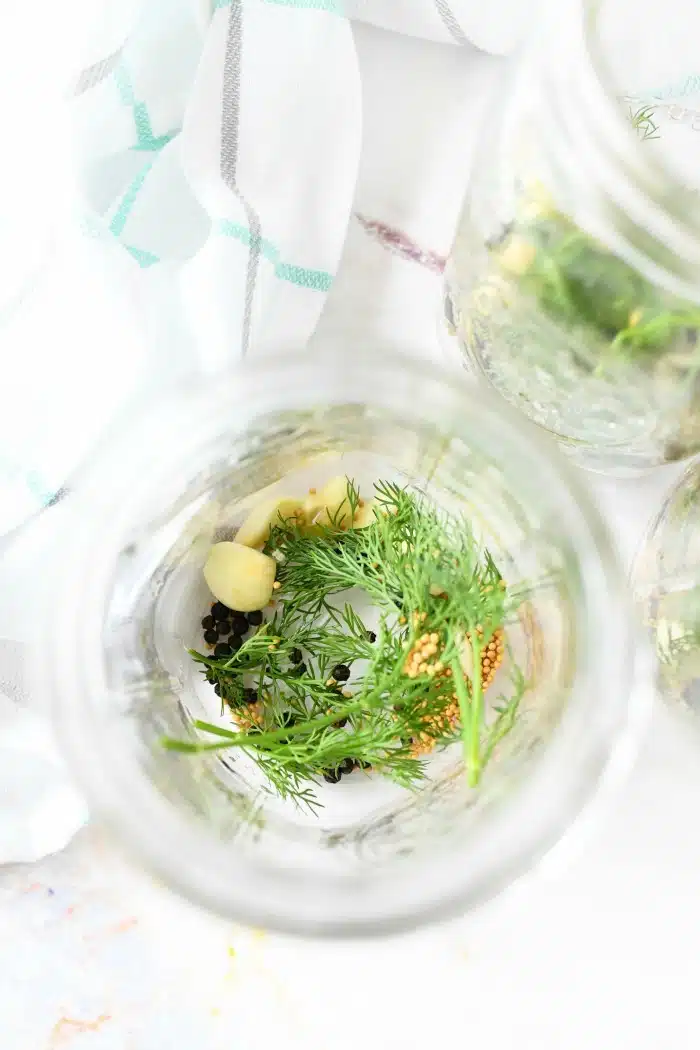
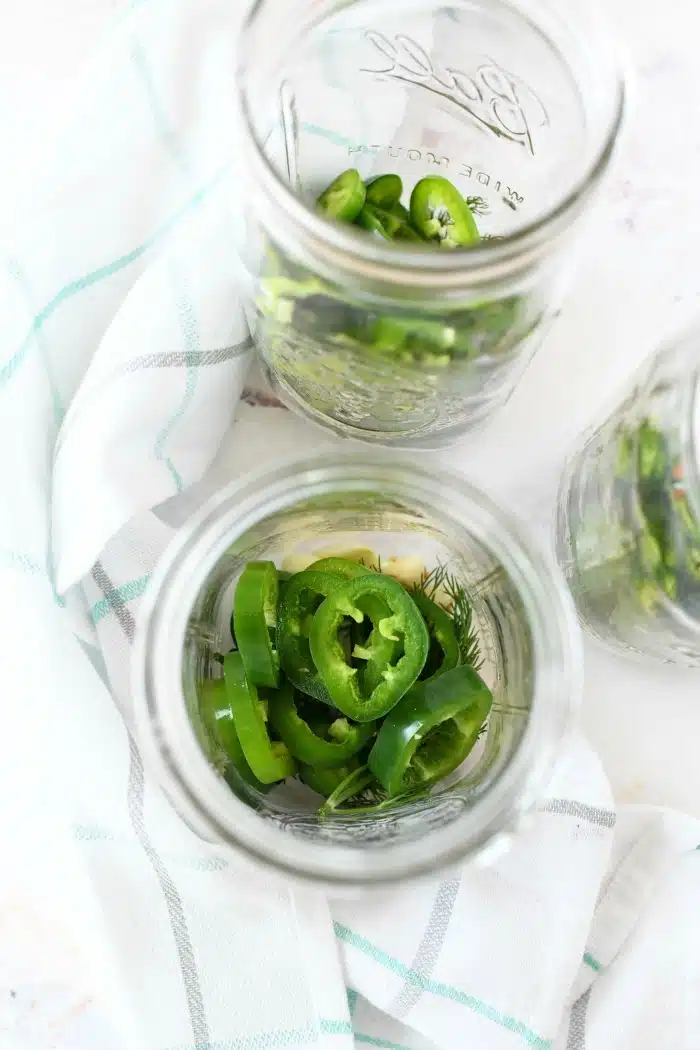
This recipe is for 3 jars only. Please increase the ingredients to meet your needs. Each jar requires 2 sliced, and seeded Jalapenos, 4 sliced and seeded Cubanol peppers, 6 garlic cloves, 1 tsp. each of mustard seed, peppercorns, and 2 sprigs of dill.
- Garlic – 18 cloves
- Peppercorns -3 tsps.
- Mustard Seeds 3 tsps.
- Fresh dill- 6 large sprigs
- 6 Jalapenos
- 6 large Cubanol peppers
Tips for making these
It is very easy to get gourmet tasting peppers at home, but there are some tips to follow for best results.
- Use gloves to cut peppers. Do not touch your face, eyes, etc. The oils in capsaicin are very powerful and can burn you. If you do get pepper oil on your hand rinse them with water and soak the area with whole milk.
- Allow brine to cool completely before filling the jars. If you add hot water to the peppers they will soften and get mushy.
- Use only fresh jar ingredients. Fresh dill, mustard seed, and peppercorns go a long way.
- For maximum garlic flavor consider gently smashing the clove so the oils and flavors can penetrate easily.
- Use spring water or filtered water as chlorinated water can alter the taste and process.
How long do these last?
When prepared correctly, cold-packed pickled peppers will last 6 months in the fridge when sealed and untouched. However, an already opened jar will last up to 6 weeks for best taste.
Are these spicy?
This batch of peppers falls somewhere in the middle for spice. They were not overly hot since pickling Jalapenos makes them less spicy on the tongue. I would say they have a much tastier, gourmet flavor versus a high heat flavor.
Ways to serve these
These pickled peppers are great on a cheese or snack board. They are also delicious in an Italian Grinder, or in salad. We love snacking on these with cold cuts. They are low in carbs and calories making them an ideal snack!
Cold Packed Pickled Peppers
Equipment
- 12-quart canning pot
- 6-quart stockpot
- canning tongs
- jar funnel
- kitchen towel
- 1-quarts canning jars + lids
Ingredients
Brine
- 8 cups distilled vinegar
- 3 cups filtered water
- 1 Tsp pickling salt
- 2 tbsps. granulated sugar
Pickled Peppers
- 6 large Cubanol peppers remove stem, and slice, de-seed
- 6 large Jalapeno peppers
- 18 cloves garlic
- 6 large springs of fresh dill
- 3 tsps. mustard seeds
- 3 tsps. black peppercorns
Instructions
- Remove any debris from your cans and wash them with hot water and suds.Place jars in a large stock pot or canning pot (we used our pressure canning pot). Fill the pot and jars with water so everything is covered, and add the lids in. Make sure you only use fresh lids and rims.Bring pot water to a rapid boil and continue to boil for 15 minutes. Once they are done boiling, remove the pan from the heat and place it on a cool burner. Using canning tongs, carefully remove each jar and place them on a clean towel to dry
- Add water, distilled vinegar, sugar, and pickling salt to your 6-quart stock pot, and stir. Bring to a boil and remove from heat to cool.
- Wash and dry your peppers. Remove the stems from the peppers. Slice peppers into 1/4" thick rings. Remove most seeds- it is okay if there are some.
- Peel garlic cloves and gently smash them a bit so they can release more oils.
- Add the spices to each jar. Add 2 sprigs of dill, 6 cloves to each, and 2 sliced Jalapenos, and 4 sliced Cubanol peppers.
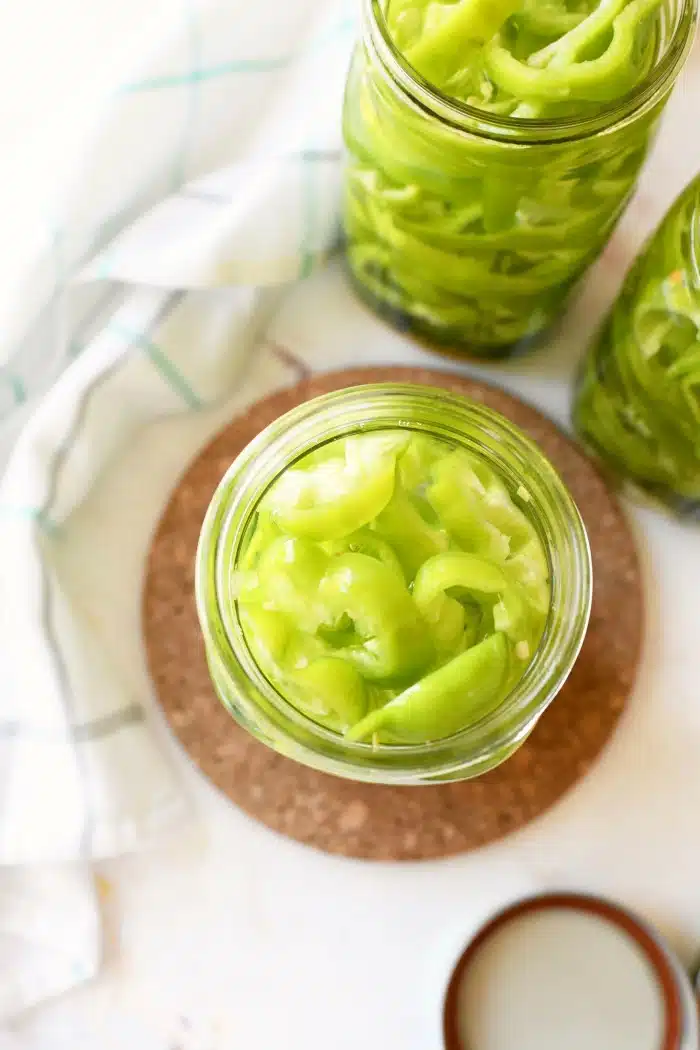
- Fill each jar with cooled brine until it reaches the top. Then, add the lid and rim and screw them on tightly.
- Store jars in the fridge for 2-3 weeks until enjoying! See notes for how long they last.
Notes
Tips for making these
It is very easy to get gourmet tasting peppers at home, but there are some tips to follow for best results.- Use gloves to cut peppers. Do not touch your face, eyes, etc. The oils in capsacin are very powerful and can burn you. If you do get pepper oil on your hand rinse them with water and soak the area with whole milk.
- Allow brine to cool completely before filling the jars. If you add hot water to the peppers they will soften and get mushy.
- Use only fresh jar ingredients. Fresh dill, mustard seed, and peppercorns go a long way.
- For maximum garlic flavor consider gently smashing the clove so the oils and flavors can penetrate easily.
- Use spring water or filtered water as chlorinated water can alter the taste and process.
I bet these peppers would taste great on a pizza, too! Can’t wait to try them!
This is a very easy pickle recipe to follow. We love these with everything, especially when added into any kind of salad.
I never knew you could use the refrigerator method to pickle peppers. I’m gonna give this a try with banana peppers – YUM!
I’ve also touched my face while working with chili peppers— it is a mistake you only make once! Thanks for this recipe!
This is perfect for all the peppers I have growing in my garden! So excited to make this as part of a cheese board!
We do these however we just make sure the brine is boiling, jars and lids are hot then pack and seal. No canning and no refrigeration. We put them in the pantry for three weeks before opening a jar. Great
Is it 8 cups vinegar or water,recipe has two different list.
Hi Dave,
Sorry for the confusion. The recipe card lists the correct vinegar and water amounts. 8 cups vinegar and 3 cups water is correct. I updated the post content.