If you’ve been searching for the ultimate S’mores cookie, your quest ends here. After years of development, I’ve perfected a signature base dough that delivers bakery-quality results without the wait—no chilling required. These stuffed cookies are indulgent, gourmet, and easily the best treat on the block. They’re so good, I’d be selling them if I could!
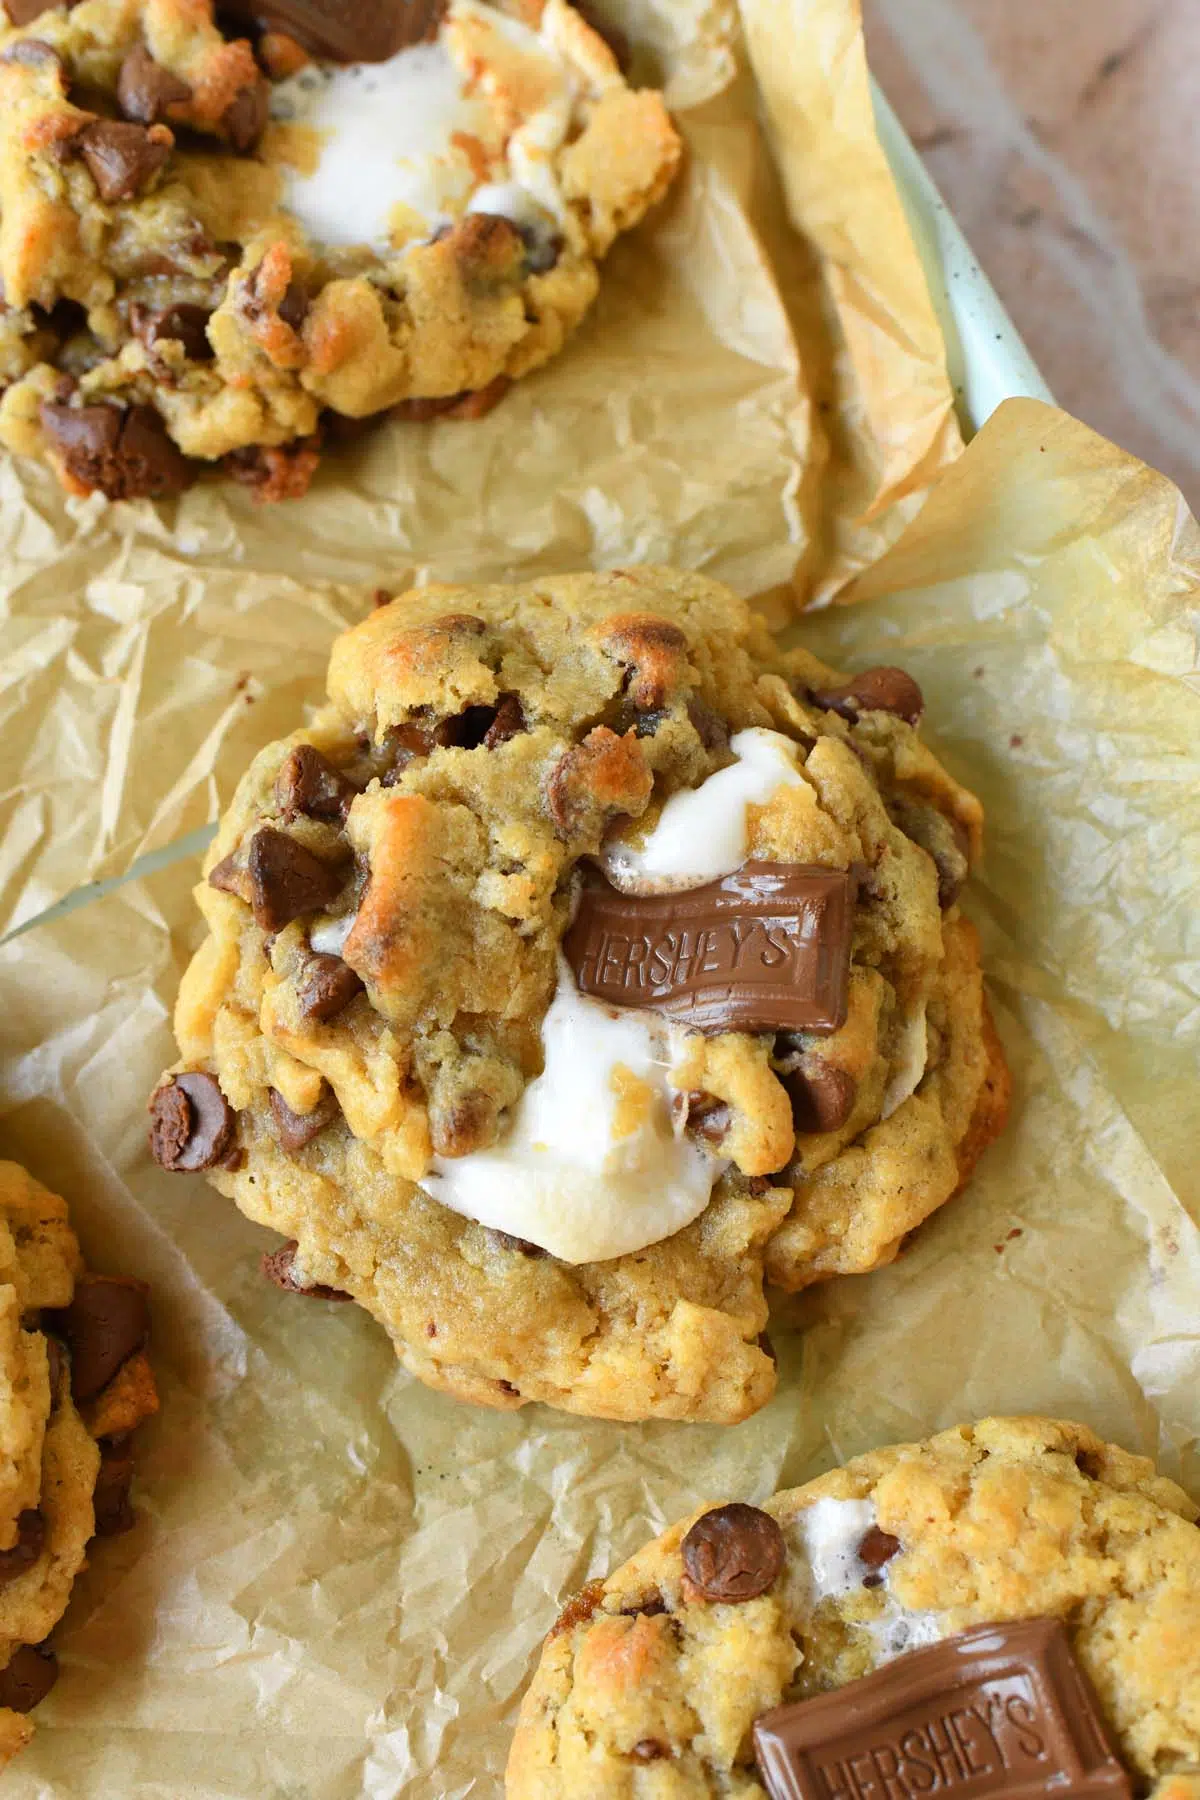
These jumbo cookies are built on a graham cracker base, topped with melty chocolate and a hidden marshmallow center, then encased in a rich, buttery dough. They are the perfect way to get that campfire experience right from your own oven.
Why You’ll Love This Recipe
- The “Stuffing” Technique: By using a graham cracker as the base, you get the authentic flavor of a s’more without the dough turning soggy.
- Zero Chill Time: Most cookie recipes demand hours of waiting. Not this one. You can go from craving to eating in just 25 minutes.
- Bakery-Style Texture: The combination of cornstarch and a precise ratio of brown sugar ensures a soft, chewy center that stays moist for days.
Ingredients
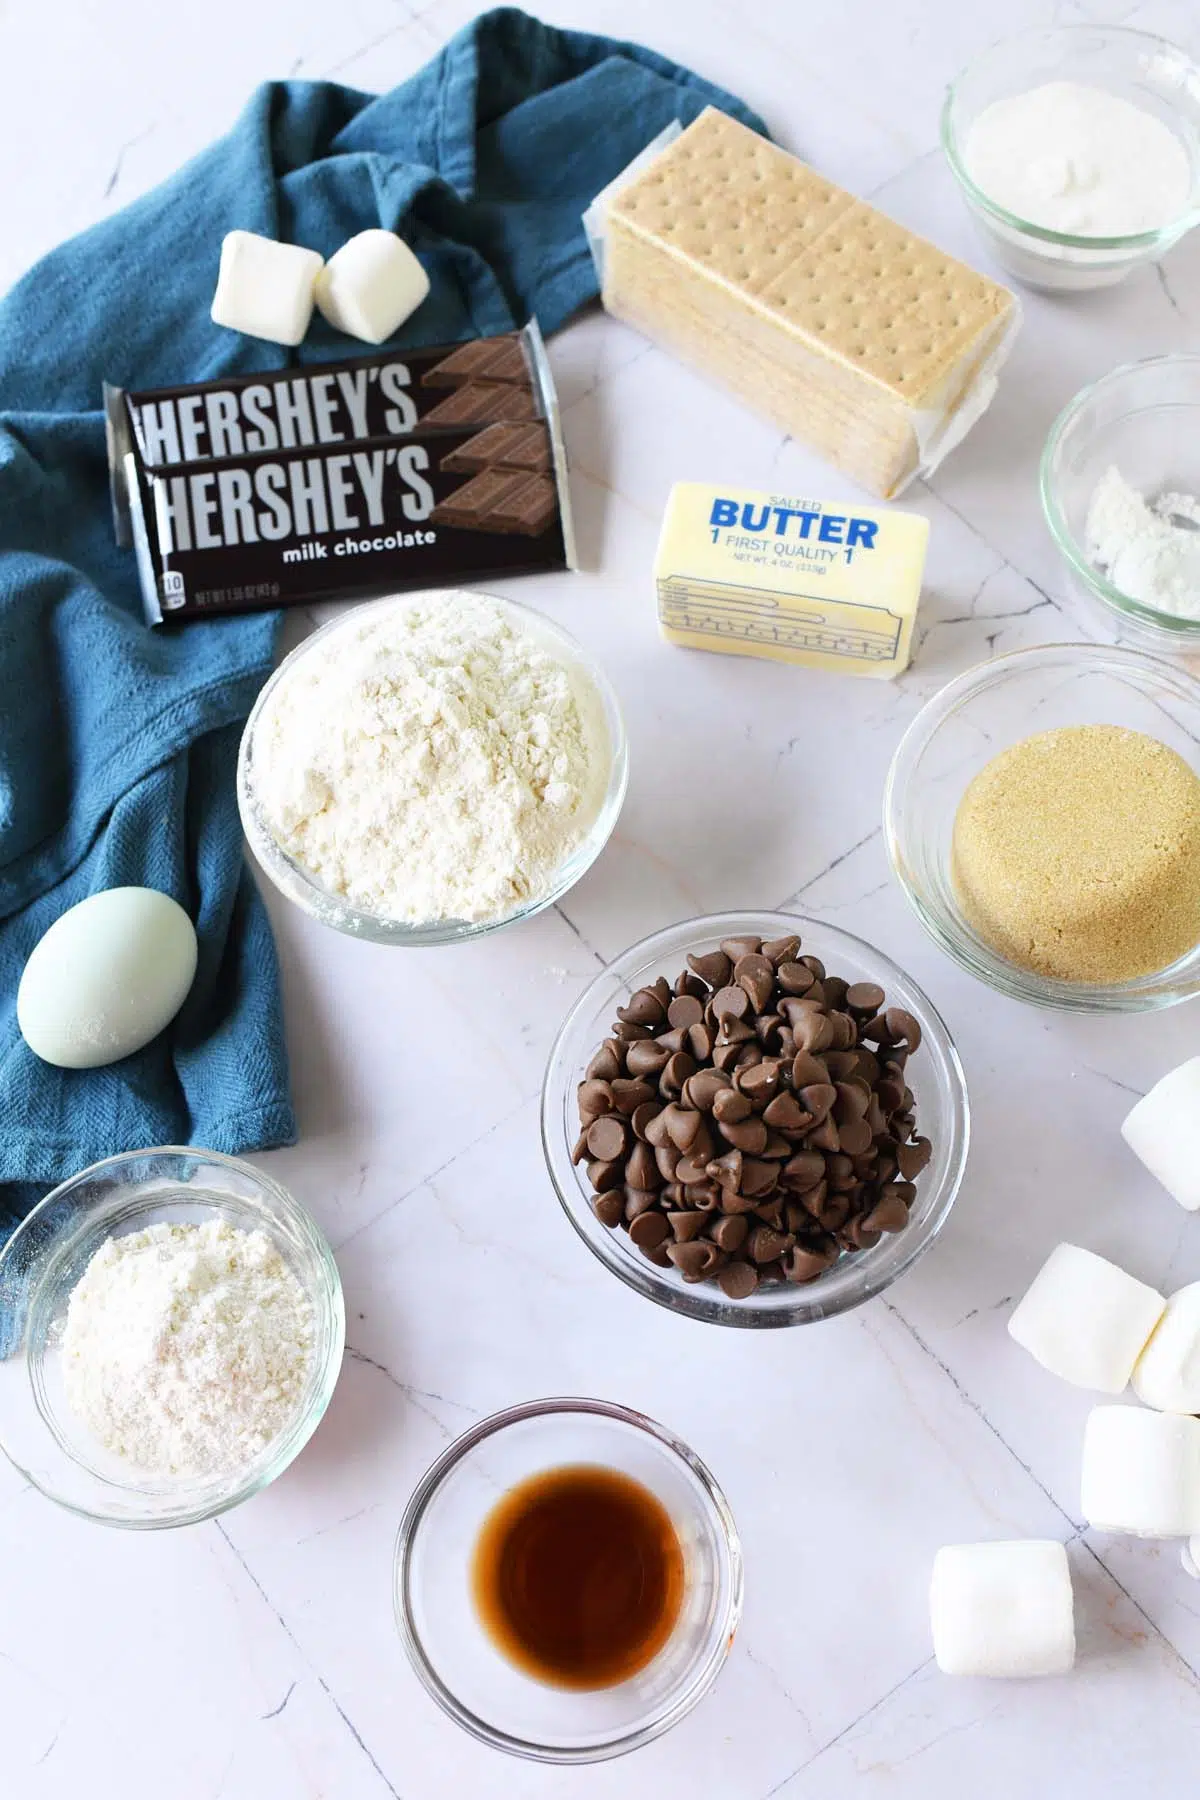
- Butter: ½ cup (8 tbsp) salted butter, melted. Tip: Ensure the butter is warm but not piping hot before mixing with the egg.
- Sugars: ⅓ cup granulated sugar (for crisp edges) and ½ cup light brown sugar (for moisture and chew).
- Flavor: 2 tsp vanilla extract. Use a high-quality pure vanilla extract for the best depth of flavor.
- Binder: 1 large egg (room temperature is best).
- Dry Ingredients: 1 ⅓ cups all-purpose flour. I personally use King Arthur Organic All-Purpose; it provides a consistent, reliable structure for cookies.
- The Secret Ingredients: ½ tsp cornstarch (for that soft, bakery-style middle) and ½ tsp baking soda (for the perfect lift).
- Mix-ins: 1 cup milk chocolate chips (or semi-sweet if you prefer a darker, less-sweet profile).
- The S’mores Core: 8-9 large marshmallows (not the “jumbo” jumbo ones—standard size works best) and 9 graham cracker halves.
- Chocolate Layer: 2 full-size Hershey’s bars, broken into individual squares.
Equipment Needed
- 3-ounce ice cream scoop: This is the secret to getting “jumbo” bakery sizing and ensuring every cookie is identical. I use the Pioneer Woman floral one from Walmart.
- Two medium baking sheets: You want to ensure there is plenty of airflow.
- Parchment paper: Do not skip this! The marshmallow and chocolate will get sticky, and you want these to lift off the pan easily.
Step-by-Step Instructions
1. Prep the Oven & Pans
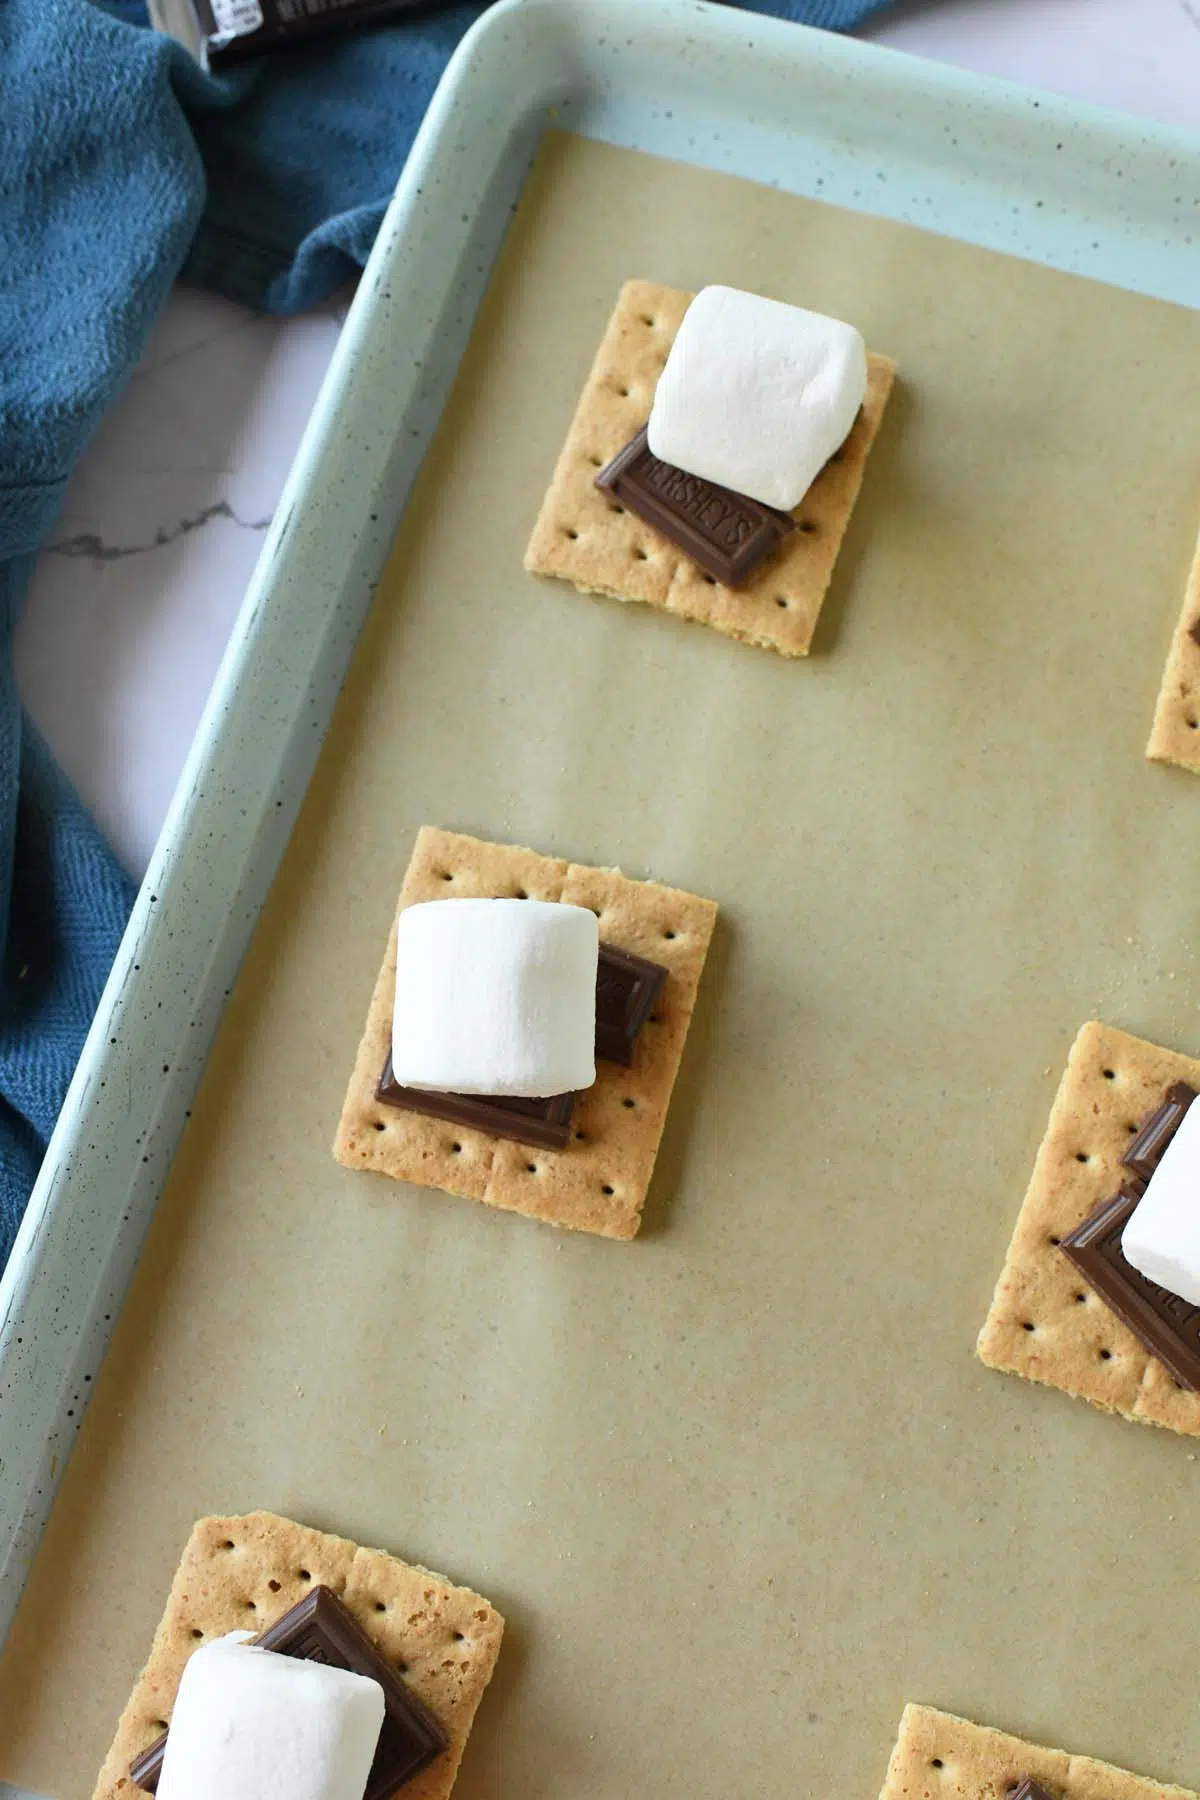
Preheat your oven to 350℉. Line your baking sheets with parchment paper. Proper spacing is vital here; arrange the 9 graham cracker halves on the sheets with at least 2 inches of space between them.
2. The Foundation
Place two squares of the Hershey’s bar onto the center of each graham cracker half. Place one large marshmallow right on top of the chocolate.
3. Create the Dough
In a large bowl, whisk the melted butter, granulated sugar, light brown sugar, vanilla extract, and egg until the mixture is smooth and glossy. In a separate small bowl, whisk the baking soda and cornstarch together (this prevents clumping), then add them to your wet mixture. Gradually mix in the flour. Fold in your chocolate chips last.
4. The “Stuffing” Technique
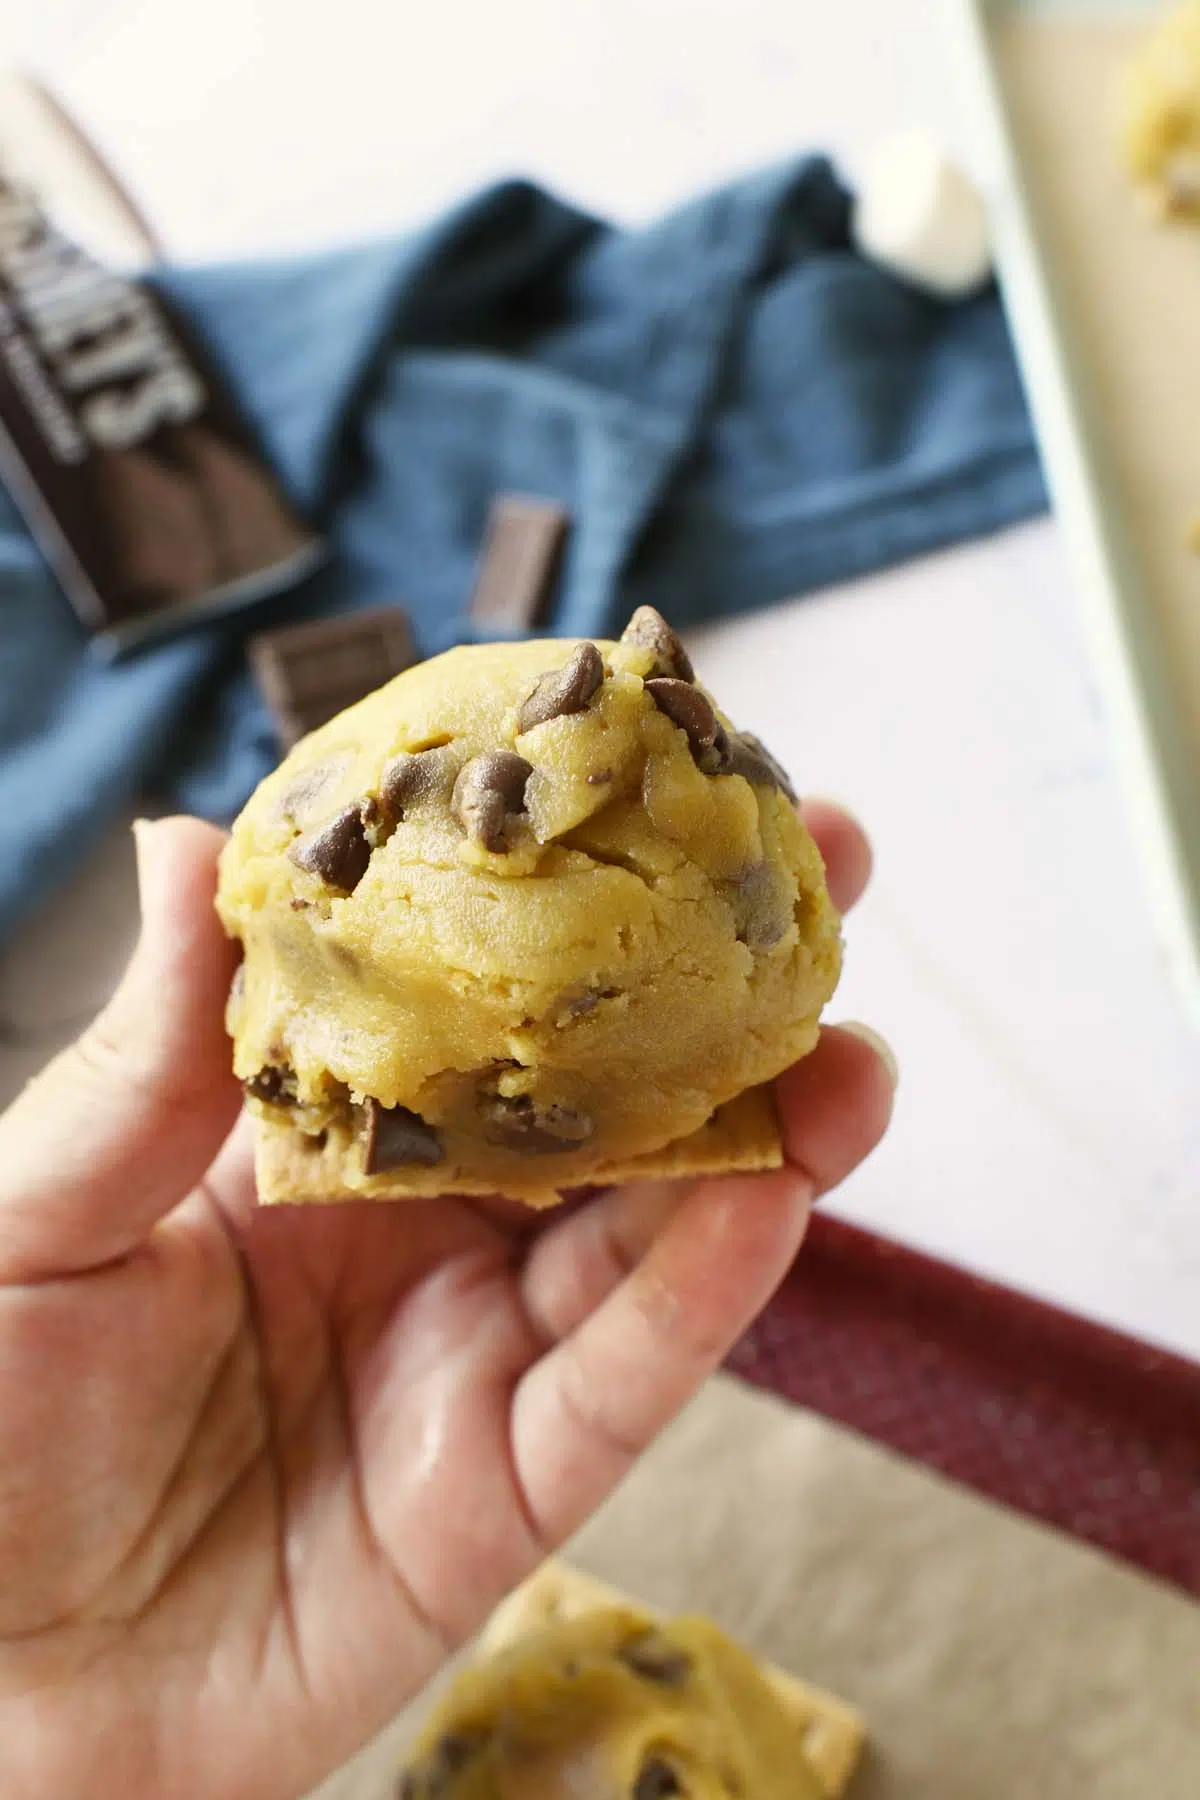
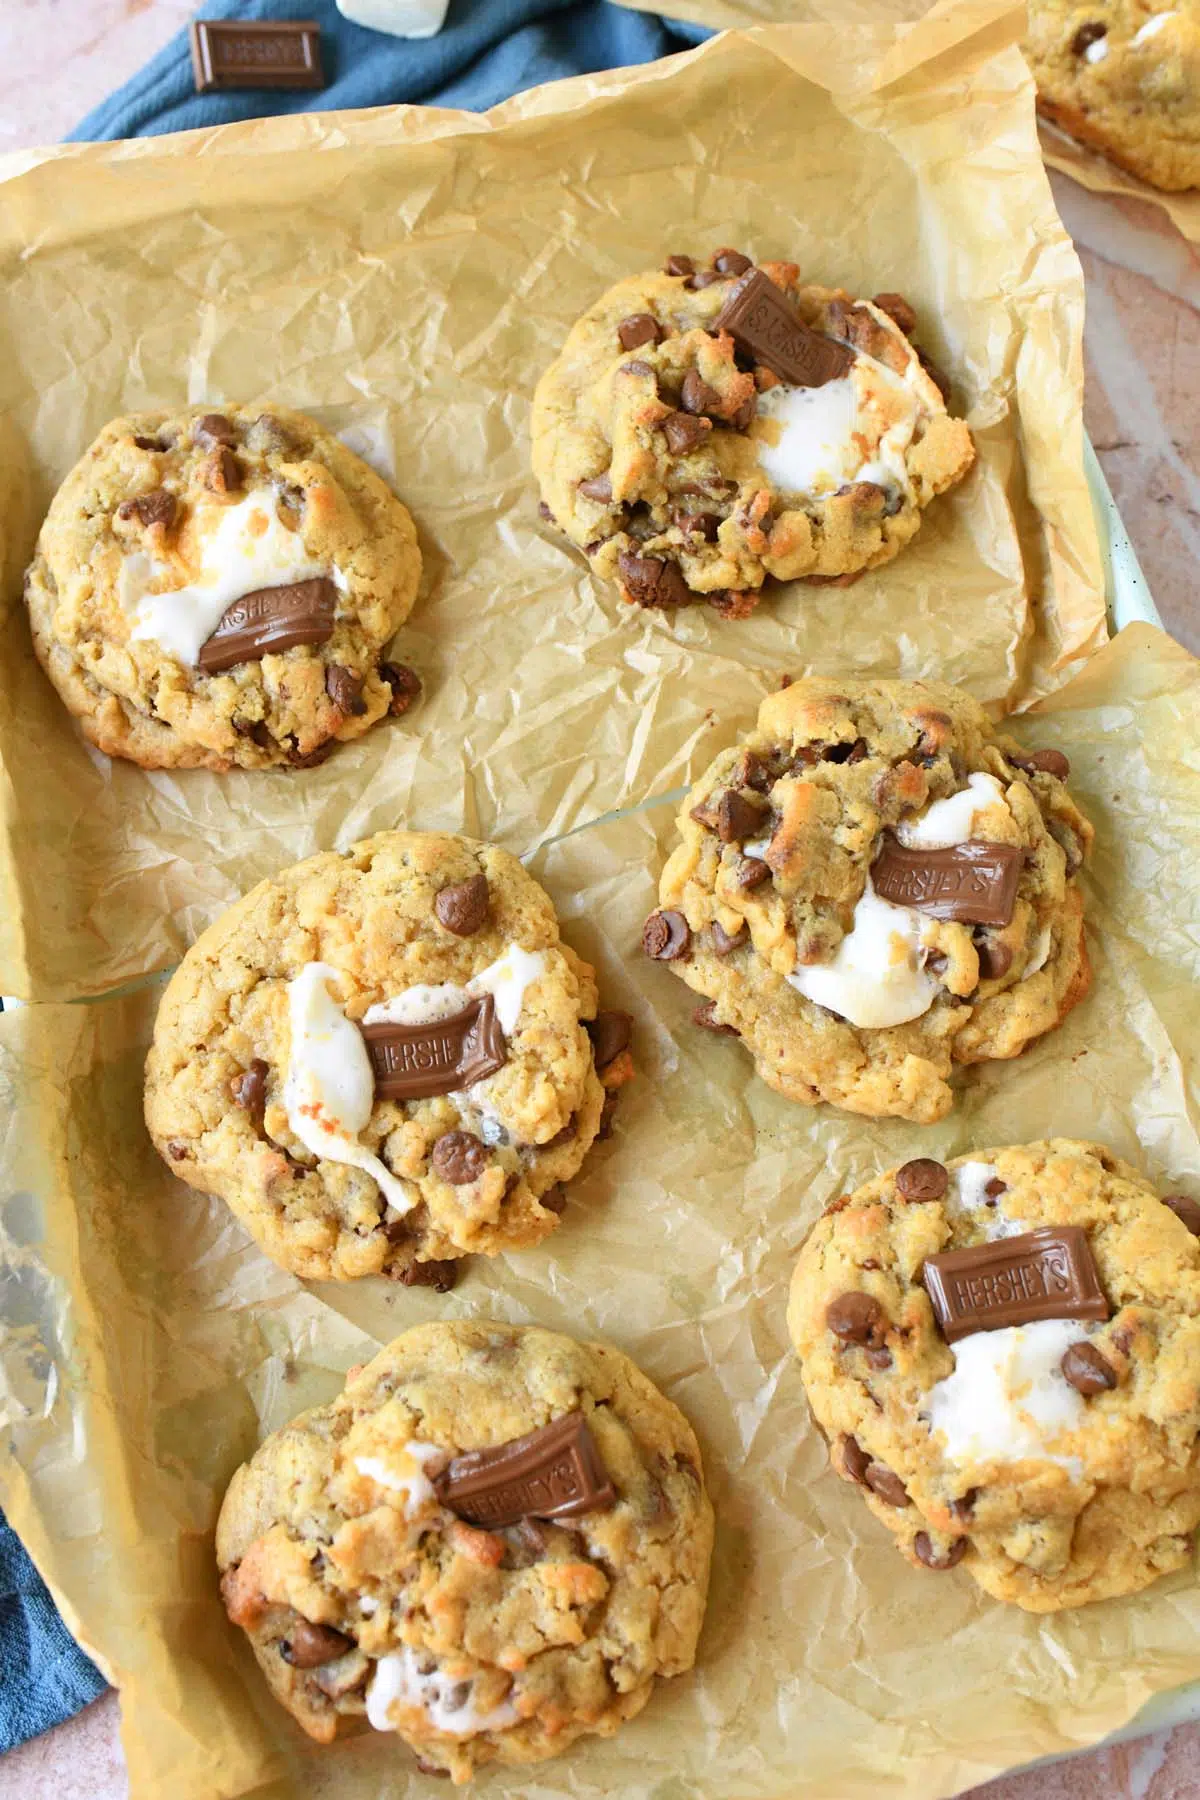
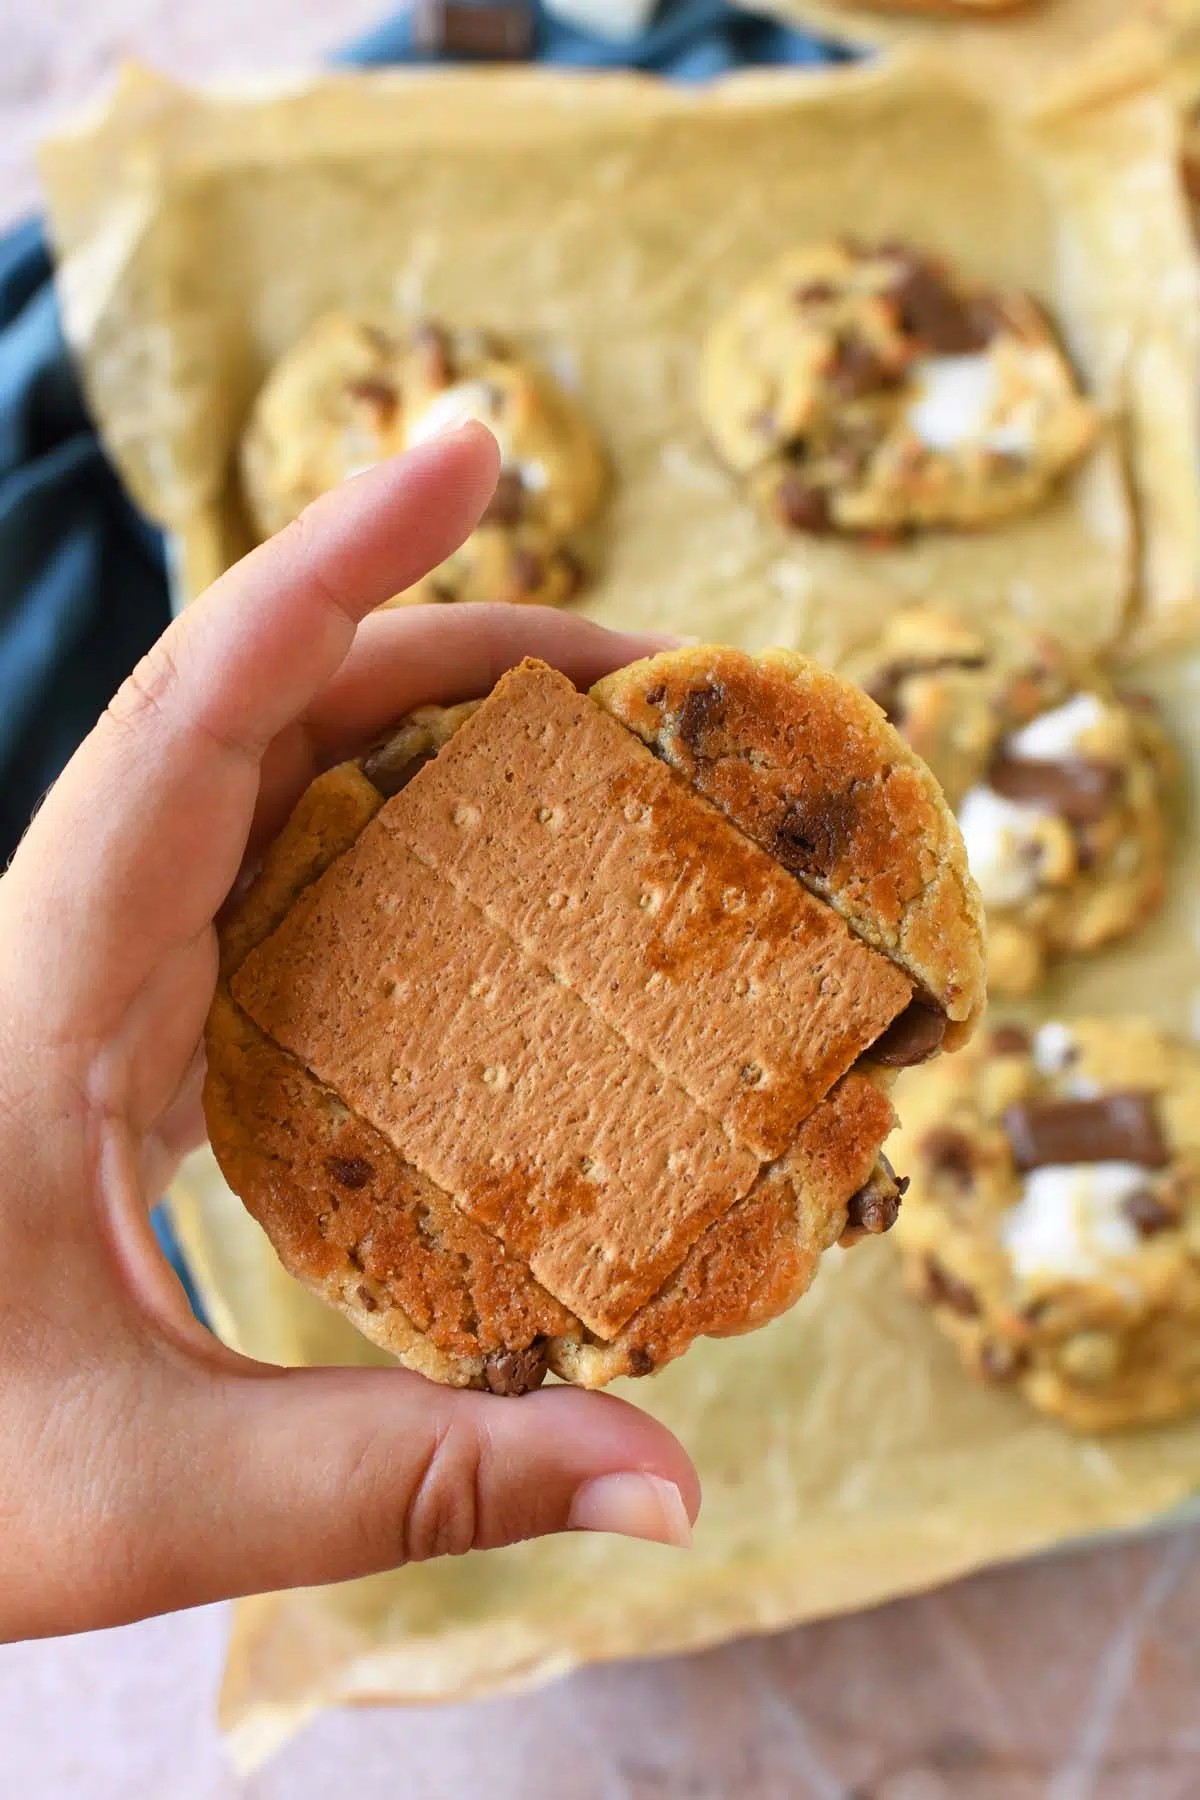
Using your 3-ounce scoop, place one generous scoop of dough directly onto the marshmallow/chocolate-topped cracker. Using your fingers, gently mold and press the dough down over the edges of the marshmallow, creating a “dome” or “shell” that seals the filling in. The graham cracker serves as the base, so try to keep the dough from pooling too far off the sides of the cracker.
5. The Bake
Bake for 15 minutes.
- The cookies will look golden-brown on the edges and appear slightly underbaked in the middle. Do not overbake! They need that “just-out-of-the-oven” softness to stay chewy once they cool.
6. The Cool Down
Allow the cookies to cool on the baking sheet for at least 15 minutes. This is a crucial step; it allows the marshmallow and chocolate center to set slightly, so the cookie doesn’t fall apart when you pick it up.
Pro-Tips for Success
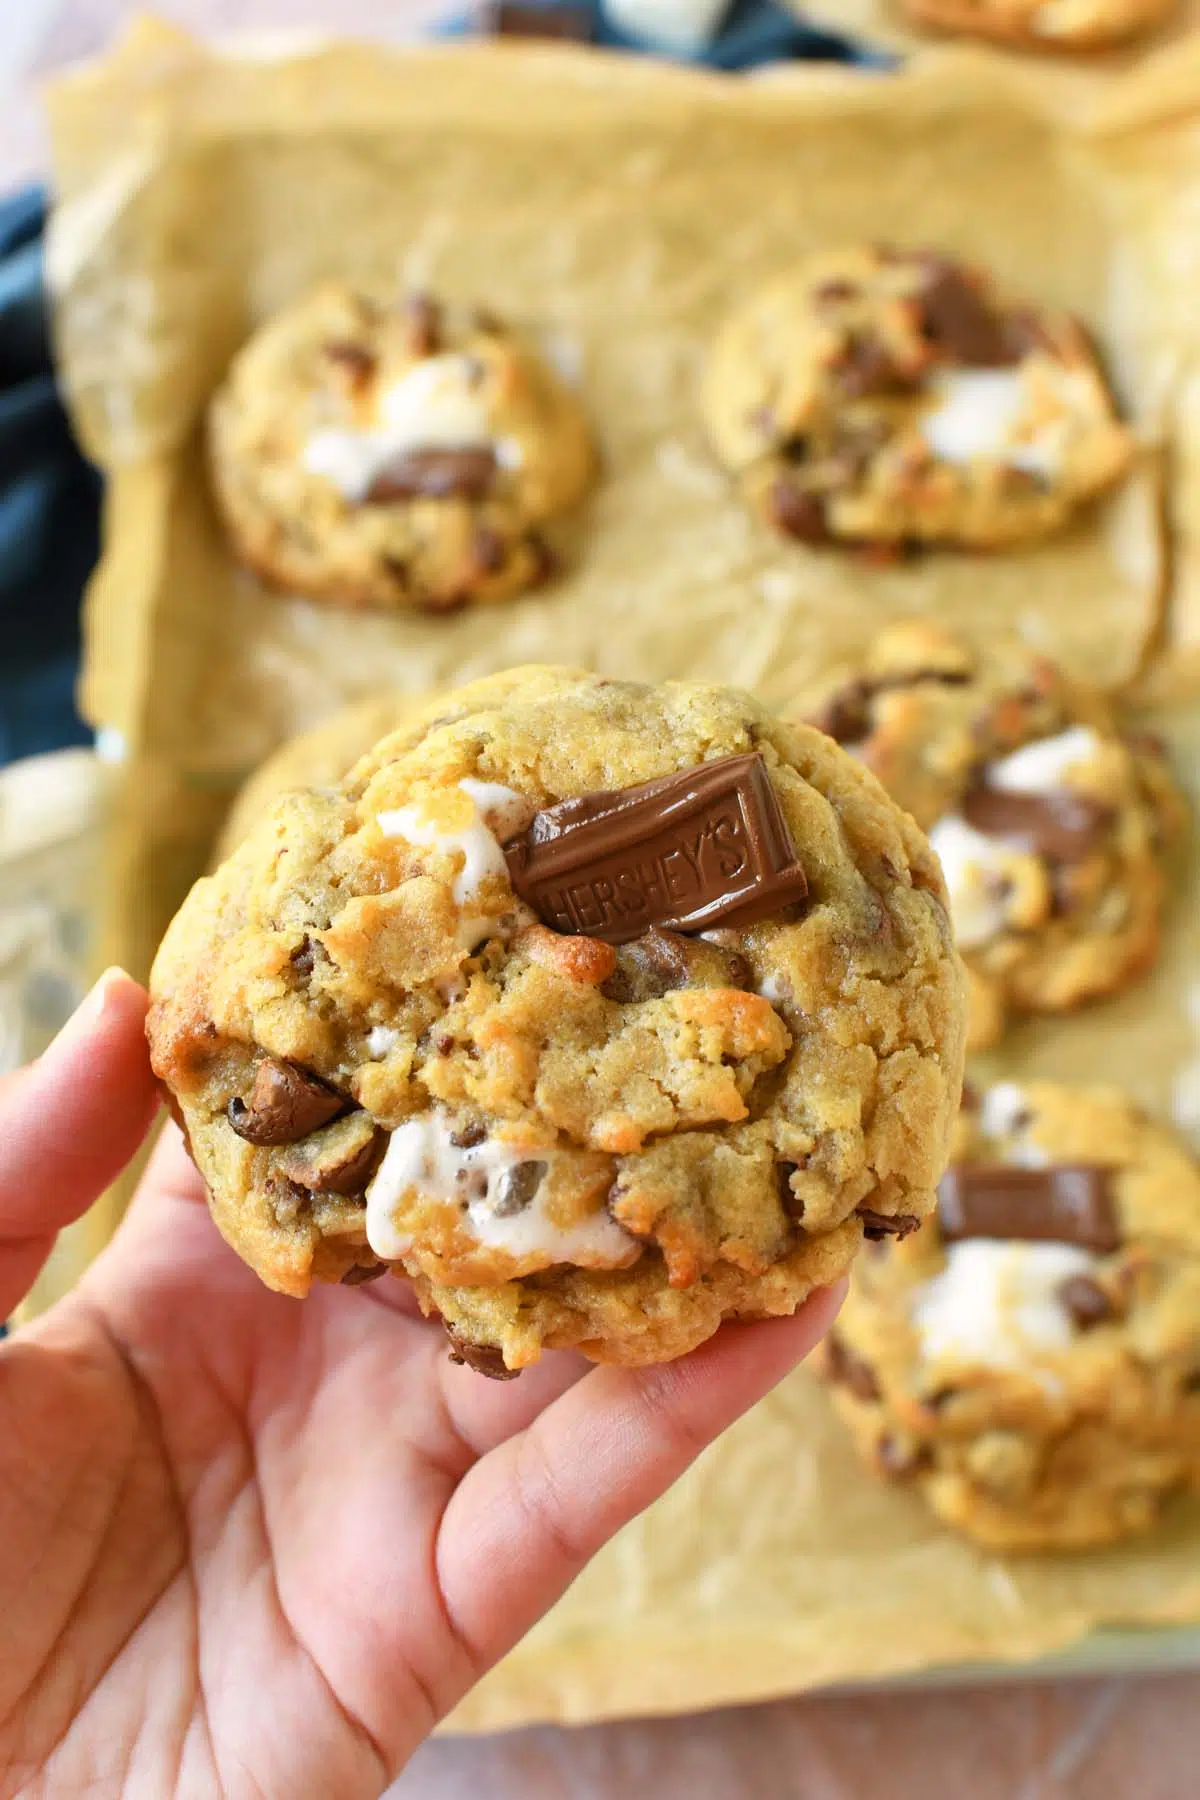
- The Marshmallow Trick: If your marshmallows are particularly tall, give them a quick squeeze before placing them on the chocolate to make them easier to cover with the dough. For me, I laid them down on their sides- see image above.
- Measuring Flour: Always use the “spoon and level” method. Don’t scoop the flour directly with your measuring cup, as this packs it down and can lead to a dry, crumbly cookie.
- Storage: These are best enjoyed warm on the day they are made. If you have leftovers, store them in an airtight container for up to 4 days. To refresh, microwave for 10–15 seconds to get that “fresh from the campfire” melt back! I did notice that the marshmallow and chocolate stays soft in a 74 degree home when stored in an airtight container for up to 4 days.
How to Freeze S’mores Stuffed Cookies
You have two primary options: freezing the pre-assembled, unbaked cookies (best for fresh baking) or freezing the fully baked cookies (best for convenience).
Option 1: Freezing Unbaked (Recommended for Freshness)
This method gives you the best “bakery-fresh” result, as the cookie will bake exactly as intended.
1. Assemble
Follow the recipe instructions through the assembly phase: place the marshmallow/chocolate on the graham cracker and mold the dough over the top.
2. Flash Freeze:1–2 hours.
Place the assembled, unbaked cookies on a parchment-lined baking sheet. Put the entire sheet in the freezer until the dough is firm and solid to the touch.
3. Store: Up to 3 months.
Transfer the frozen, solid cookie pucks into a freezer-safe zip-top bag. Squeeze out as much air as possible to prevent freezer burn.
4. Bake from Frozen:Add 2–3 minutes.
When ready to eat, place frozen cookies directly onto a lined baking sheet. Bake at 350℉ for 17–19 minutes.
Option 2: Freezing Fully Baked
If you have leftovers or want to meal-prep for a party, you can freeze them after they have fully cooled.
Thaw & Refresh:
Let them thaw at room temperature for about 30 minutes. For that “fresh-from-the-campfire” experience, microwave them for 15–20 seconds before serving.
Cool Completely:
Ensure the cookies have cooled for at least 1 hour. If you freeze them while warm, condensation will form inside the container, making the graham cracker soggy.
Wrap Individually:
Wrap each cookie tightly in plastic wrap. This prevents the marshmallow from absorbing freezer odors and protects the graham cracker from moisture.
Container/Bags
Place the wrapped cookies in an airtight freezer bag or container. They will stay fresh for up to 1 month.
More Gourmet Cookies to Try Today
- Crunchy & Chewy Peanut Butter Cookies
- Chewy Fruitcake Cookies
- Thick, No-Chill Chocolate Chip Cookies
- Peanut Butter Candy Cookies
- Banana Pudding Cookies
Bakery Style Jumbo S’mores Stuffed Cookies
Equipment
- Oven adjusted to center rack position
- 2 medium baking sheets
- parchment paper
- Measuring cups & spoons
- large mixing bowl
- Ice cream scooper 2 inches in diameter, holds 3 ounces
Ingredients
- ½ cup salted butter 8 tablespoons, melted *
- ⅓ cup granulated sugar
- ½ cup light brown sugar
- 2 teaspoons vanilla extract
- 1 large egg
- 1⅓ cups all-purpose flour *I used King Arthur organic all-purpose which I find is the best for baked goods.
- ½ teaspoon cornstarch
- ½ teaspoon baking soda
- 1 cup milk chocolate chips *can also use semi-sweet
- 8 large marshmallows *not the jumbo ones!
- 9 graham cracker halves *see image
- 2 full-size Hershey's Bars *break into individual squares *one cookie might get just one square.
Instructions
- Preheat oven to 350℉. Line two baking sheets with parchment paper.
- On two baking sheets, set up 4-5 graham cracker squares. This recipe makes 9 cookies so one sheet will have one more cookie. Spread them out so there is at least 2 inches of space between each cookie.
- Add two pieces of the Hershey's bar, and one large marshmallow to each cracker.
- In a large bowl, add melted butter, sugars, extract, and egg; mix well.
- In another bowl, mix the baking soda, and cornstarch together.
- Add the dry ingredients to the wet, and combine until no more flour streaks are visible.
- Fold in chocolate chips until just combined.
- Using a 3-ounce ice cream scooper, scoop dough balls.
- Mold the dough like a dome over the top of the chocolate and marshmallow-topped crackers. The bottoms will be the graham cracker.
- Bake for 15 minutes. Cookies will be golden-brown, and feel underbaked. They will harden and have soft-middles thanks to the chocolate bars and marshmallows.
- Cool for 15 minutes & enjoy!
Notes
- The “Spoon & Level” Rule: When measuring flour, don’t scoop directly from the bag with your measuring cup, which packs the flour down and leads to dry cookies. Instead, spoon the flour into the cup and level it off with the back of a knife.
- Preventing Spread: If you find your dough feels too soft or sticky, pop it in the fridge for 10–15 minutes before assembling. Cold dough is much easier to mold over the marshmallow and prevents excessive spreading in the oven.
- Marshmallow Management: Use standard-sized marshmallows, not “Jumbo” or “Mini.” If you only have Jumbo, cut them in half. If you only have Minis, place 3–4 together to create a center cluster.
- Achieving the Perfect Bake: These cookies should look slightly underbaked in the center when pulled from the oven. The carry-over heat from the pan will finish the cooking process as they cool. Do not bake until they look “done” in the center, or they will turn hard once cool.
- Gluten-Free Swap: You can substitute the all-purpose flour with a 1:1 gluten-free baking flour blend (like King Arthur Measure for Measure). Ensure your graham crackers are also certified gluten-free.
- Make-Ahead Dough: You can prepare the dough up to 24 hours in advance. Keep it covered in the refrigerator. Let it sit at room temperature for 15 minutes before scooping, so it is pliable enough to mold over the filling.
- Storage & Reheating: Store in an airtight container at room temperature for up to 3 days. To reheat, microwave for 10–15 seconds to restore that signature “melty” center.

Sounds delicious!