Get the perfect, no-spread cookie recipe! Our holiday mix of Peanut M&Ms and PB cups bakes up thick and tall every time. Fast prep, no chilling required.

Love this cookie recipe? You might also enjoy these Christmas Vanilla Pudding Cookies, No-Spread REESE’S Cookies, Chewy Fruitcake Cookies, or these Peppermint White Chocolate Pudding Cookies.
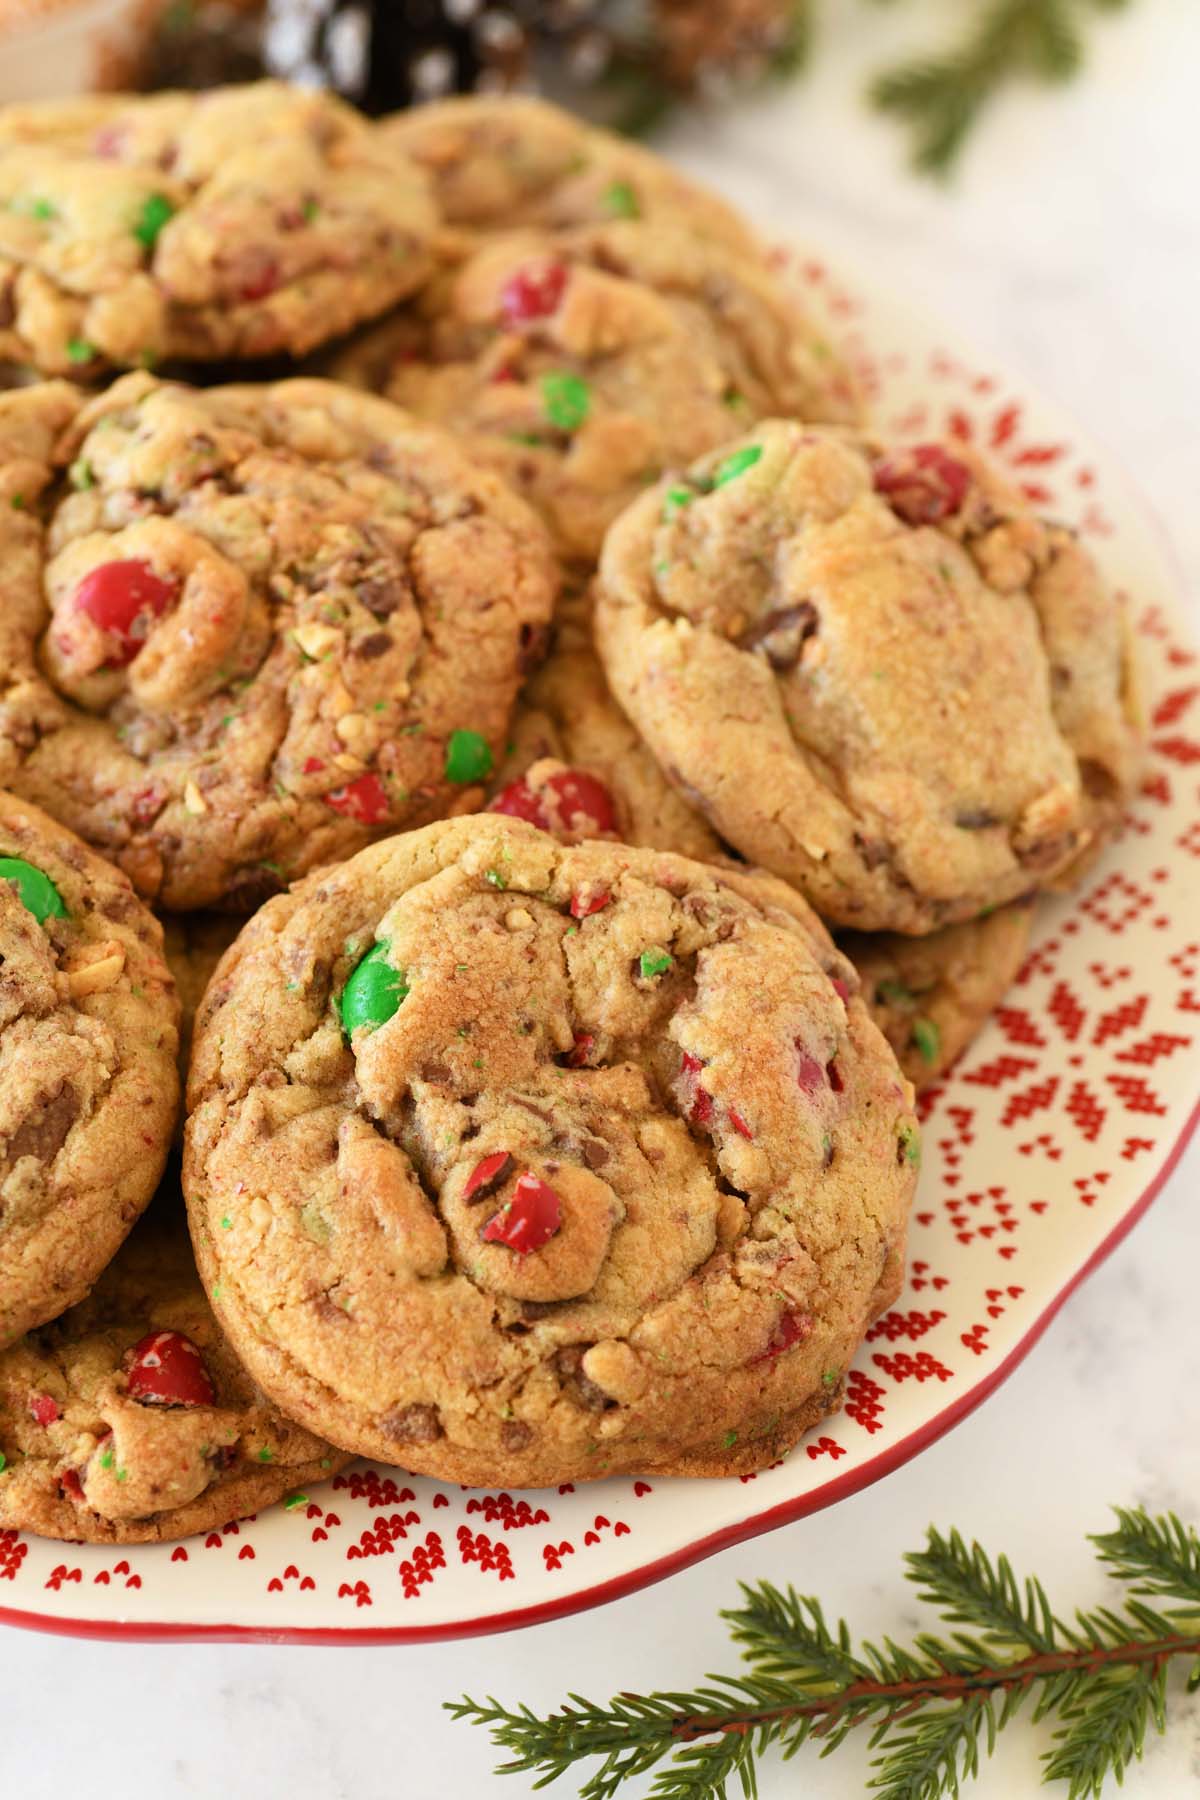
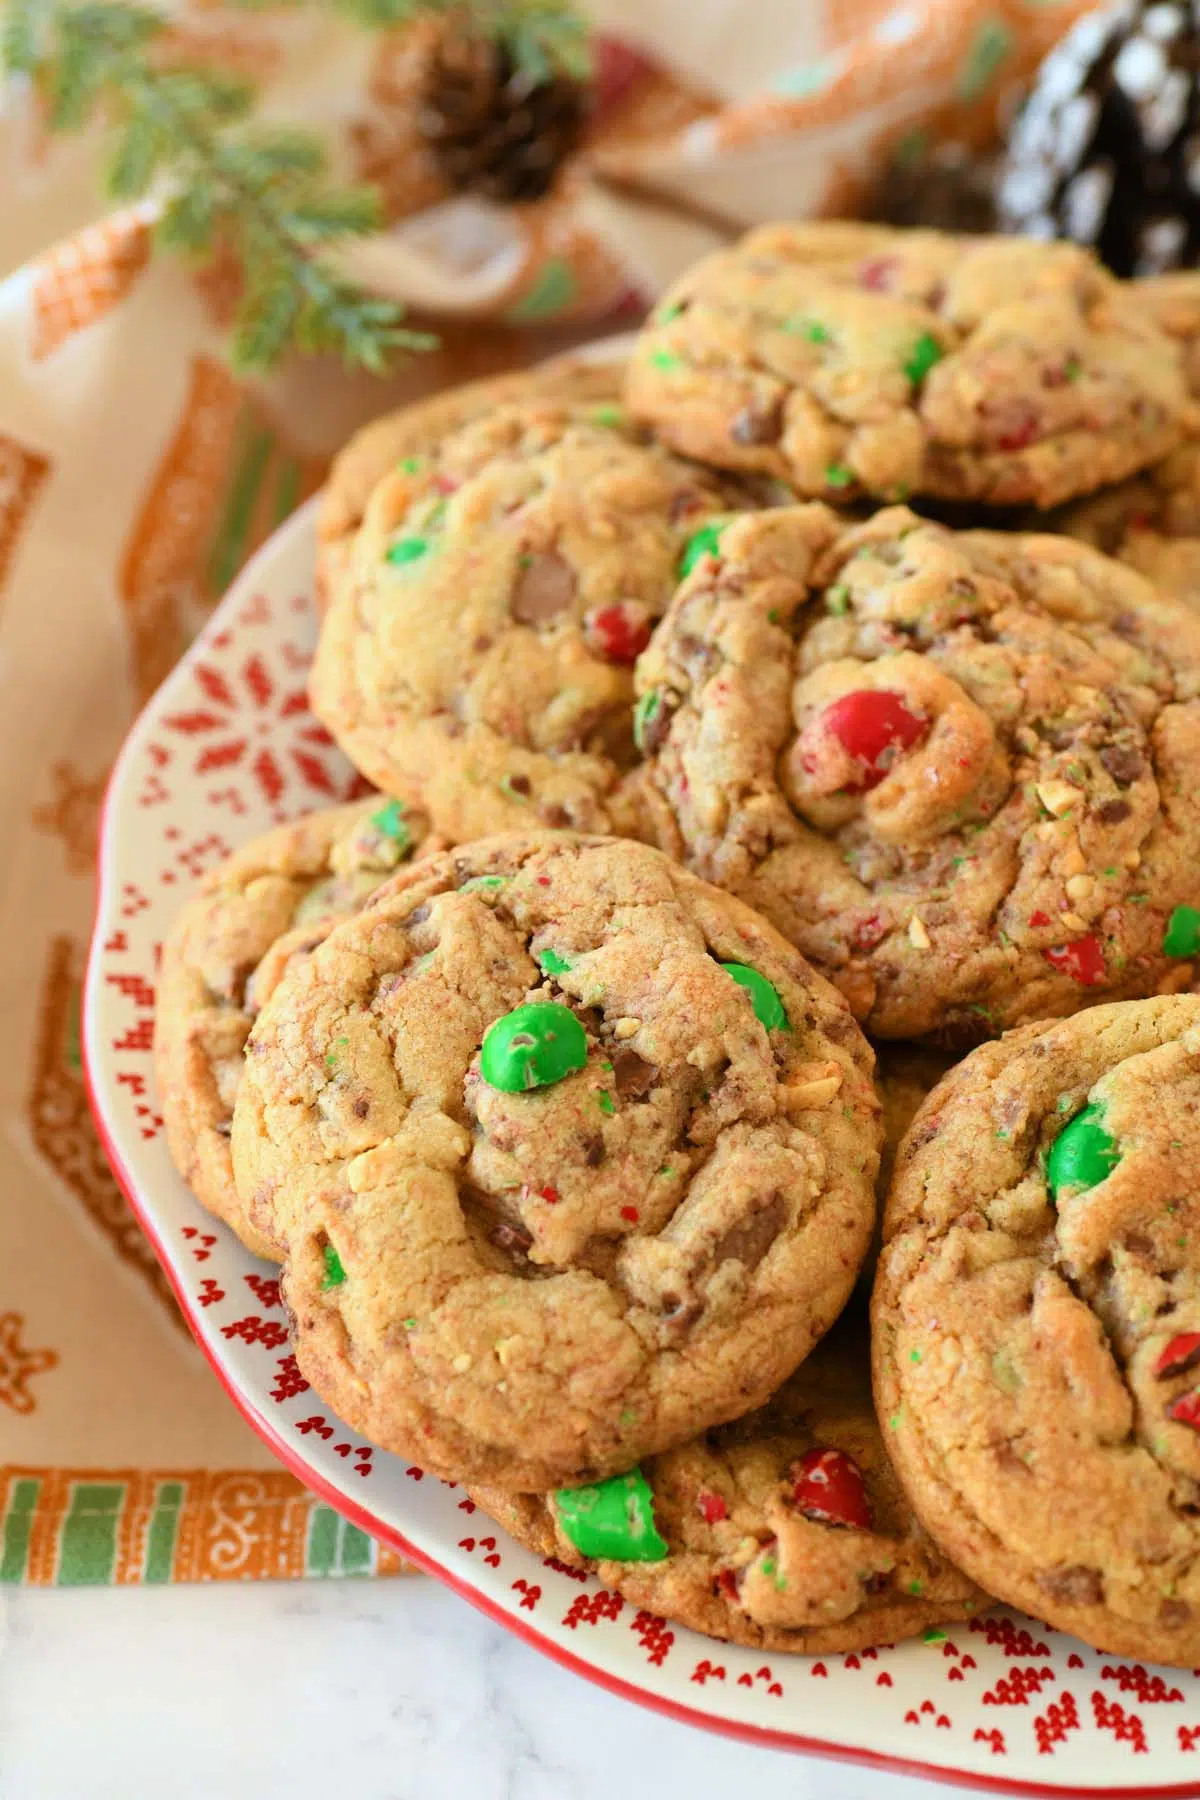
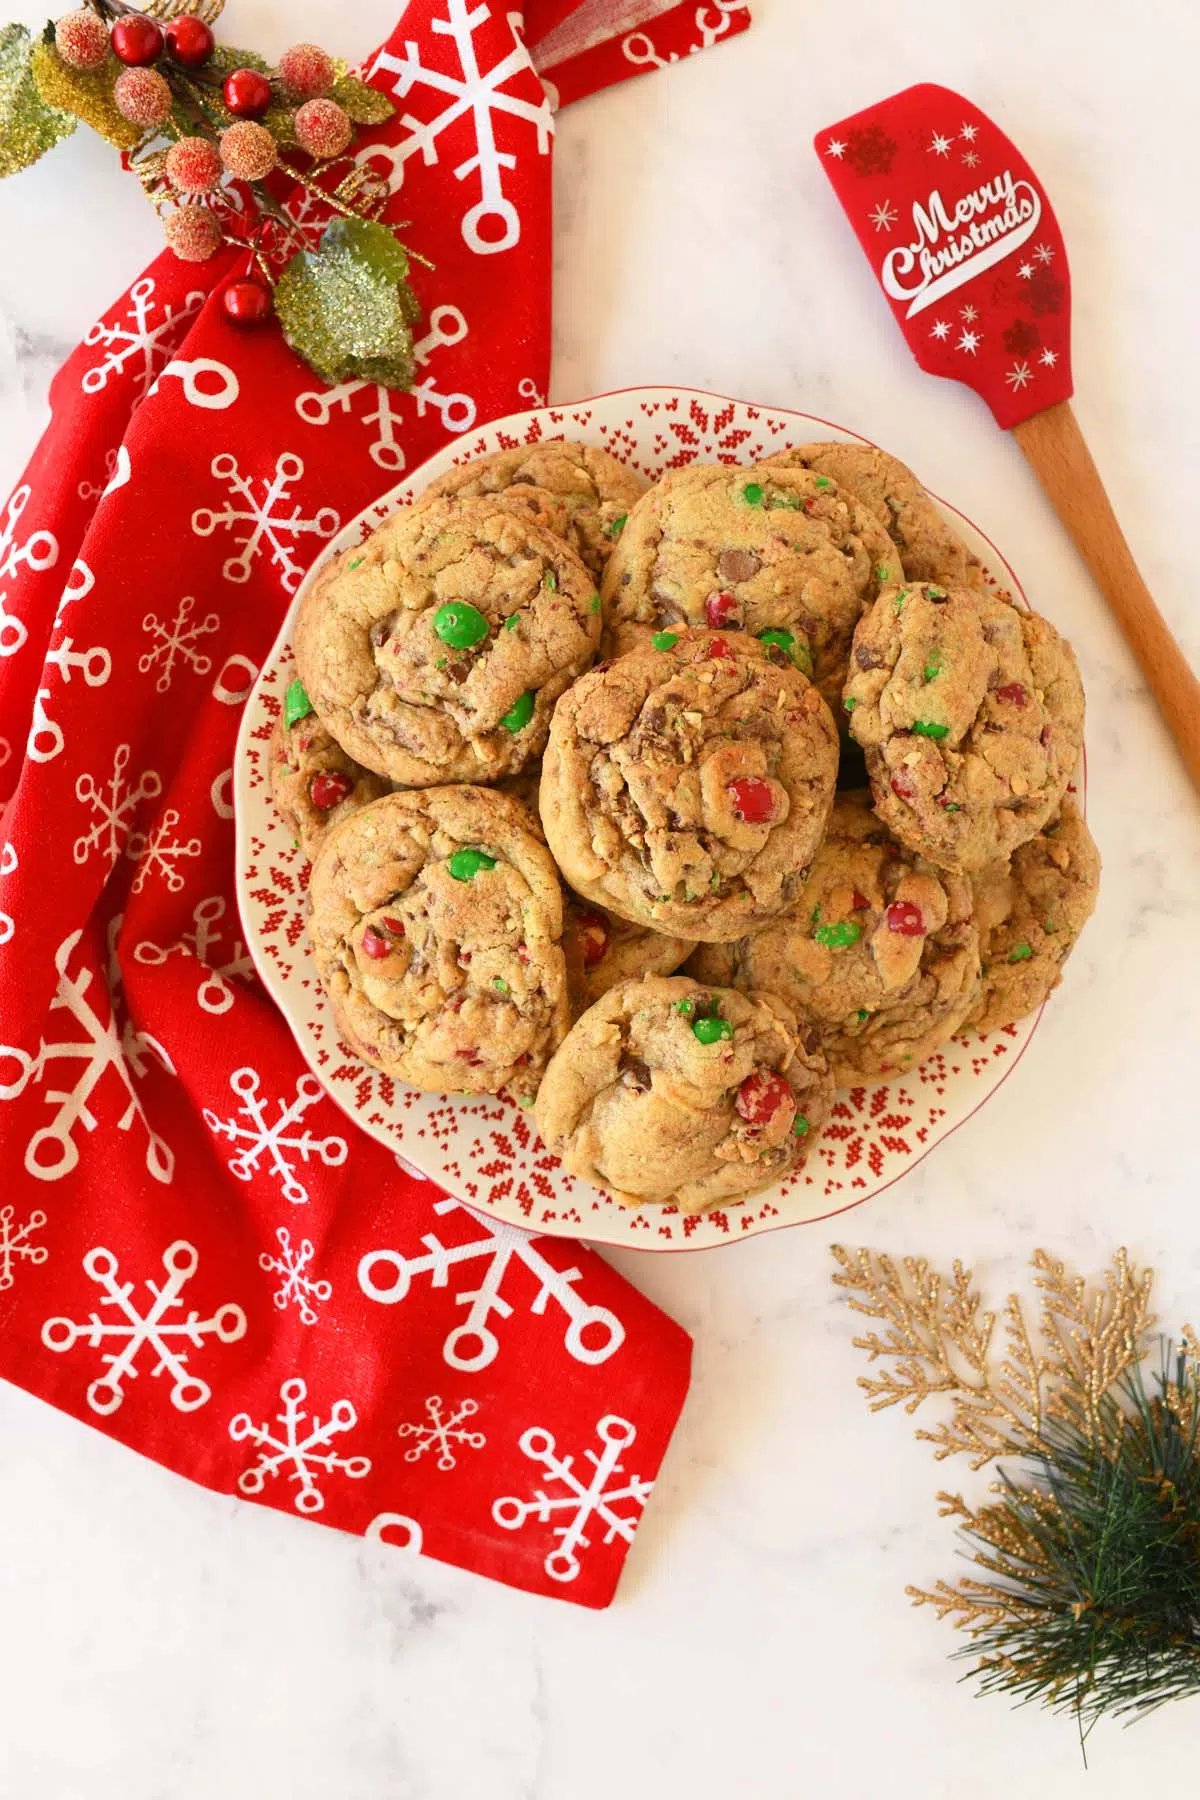
The holiday season calls for cookies that are not only irresistibly delicious but also picture-perfect. If you’ve ever baked a tray of beautifully scooped dough only to end up with a sheet of thin, sad pancakes, this recipe is for you! These No-Spread Christmas Candy Cookies deliver everything you want: a thick, chewy center, a perfect texture, and the festive crunch of two iconic candies, all without losing their shape!
Why We Love These Perfect Holiday Cookies
- Zero Spread : Thanks to one secret ingredient and a special ratio of sugar, these cookies bake up thick, ensuring every peanut butter cup chunk and M&M stays right where you put it.
- The Ultimate Flavor Combo: This cookie base is the perfect vehicle for a truly indulgent mix: the creamy milk chocolate of the mini peanut butter cups, and the festive crunch of Peanut M&Ms make them the perfect cookie for even Santa.
- Easy Gifting: Because they hold their shape so well, they are ideal for cookie swaps, holiday platters, and mailing to loved ones. They look just as good coming out of the oven as they did going in!
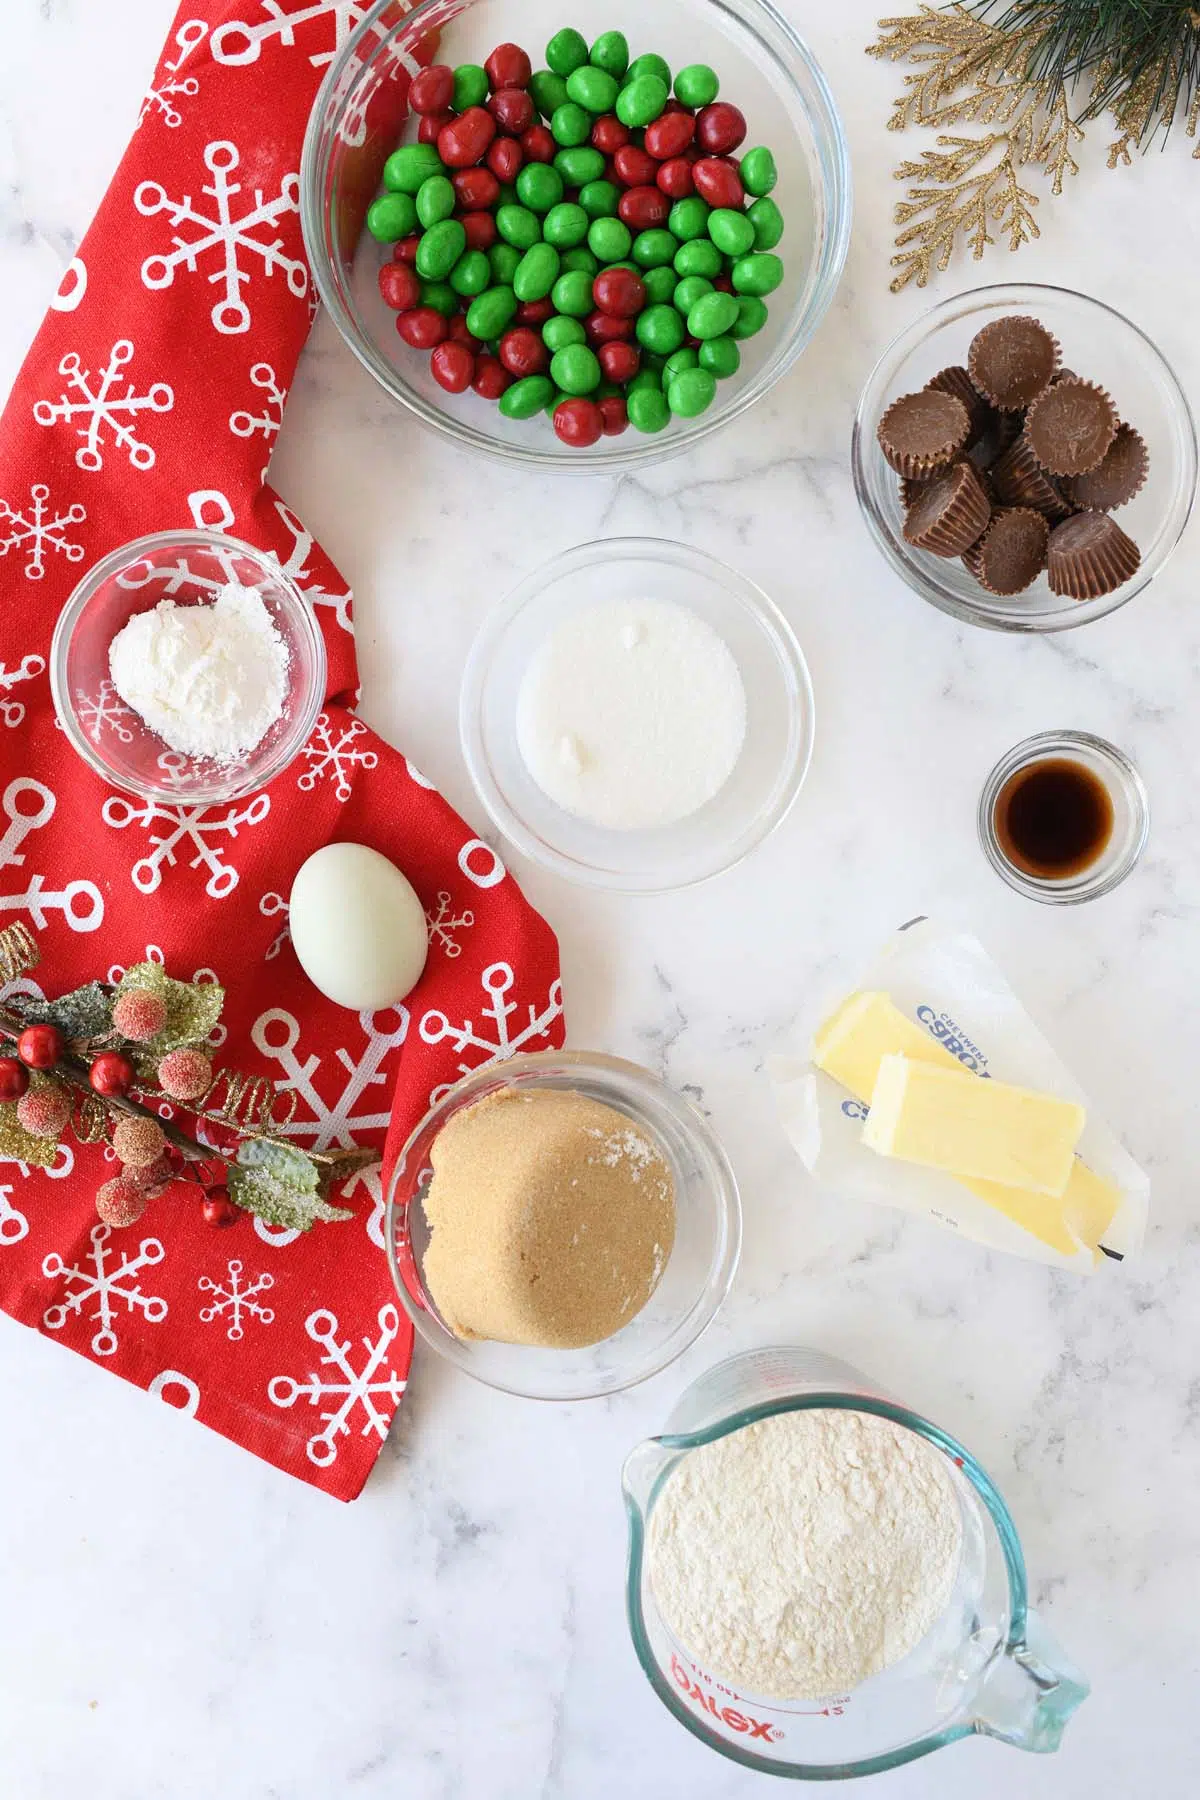
Ingredients
Unsalted Butter (Slightly Cool): Provides richness and flavor. Using it slightly cool, rather than fully softened, helps control the spread of the cookie by melting slowly in the oven.
Light Brown Sugar: This is a key tenderizer. The molasses adds moisture, resulting in a deeper flavor and a softer, chewier final texture.
Granulated Sugar: Primarily adds sweetness and aids in the spread and crisping of the cookie edges.
Large Egg (Room Temperature): Acts as a binder, holding all the ingredients together, and contributes to the cookie’s structure and richness. Using it at room temperature helps it emulsify (mix) better with the creamed butter and sugars.
Vanilla Extract: Enhances the overall flavor profile, adding warmth and depth to the cookie base.
All-Purpose Flour: Provides the necessary structure and bulk for the cookie dough.
Baking Soda: The primary leavening agent; it works with the acidity of the brown sugar to help the cookies rise slightly and achieve a desirable texture.
Salt: Balances the sweetness of the sugars and enhances the flavor of the chocolate and peanut elements.
Cornstarch (The Secret Ingredient): This is the anti-spread stabilizer. It is a starch that thickens the dough and keeps the cookies from flattening out excessively, ensuring they bake up thick and chewy instead of thin and crispy.
Peanut M&Ms & Mini Peanut Butter Cups: These are the primary mix-ins. They provide texture (crunchy peanuts, creamy chocolate), visual appeal (holiday colors), and the signature indulgent flavor.
Quick Recipe Steps (full printable recipe below)
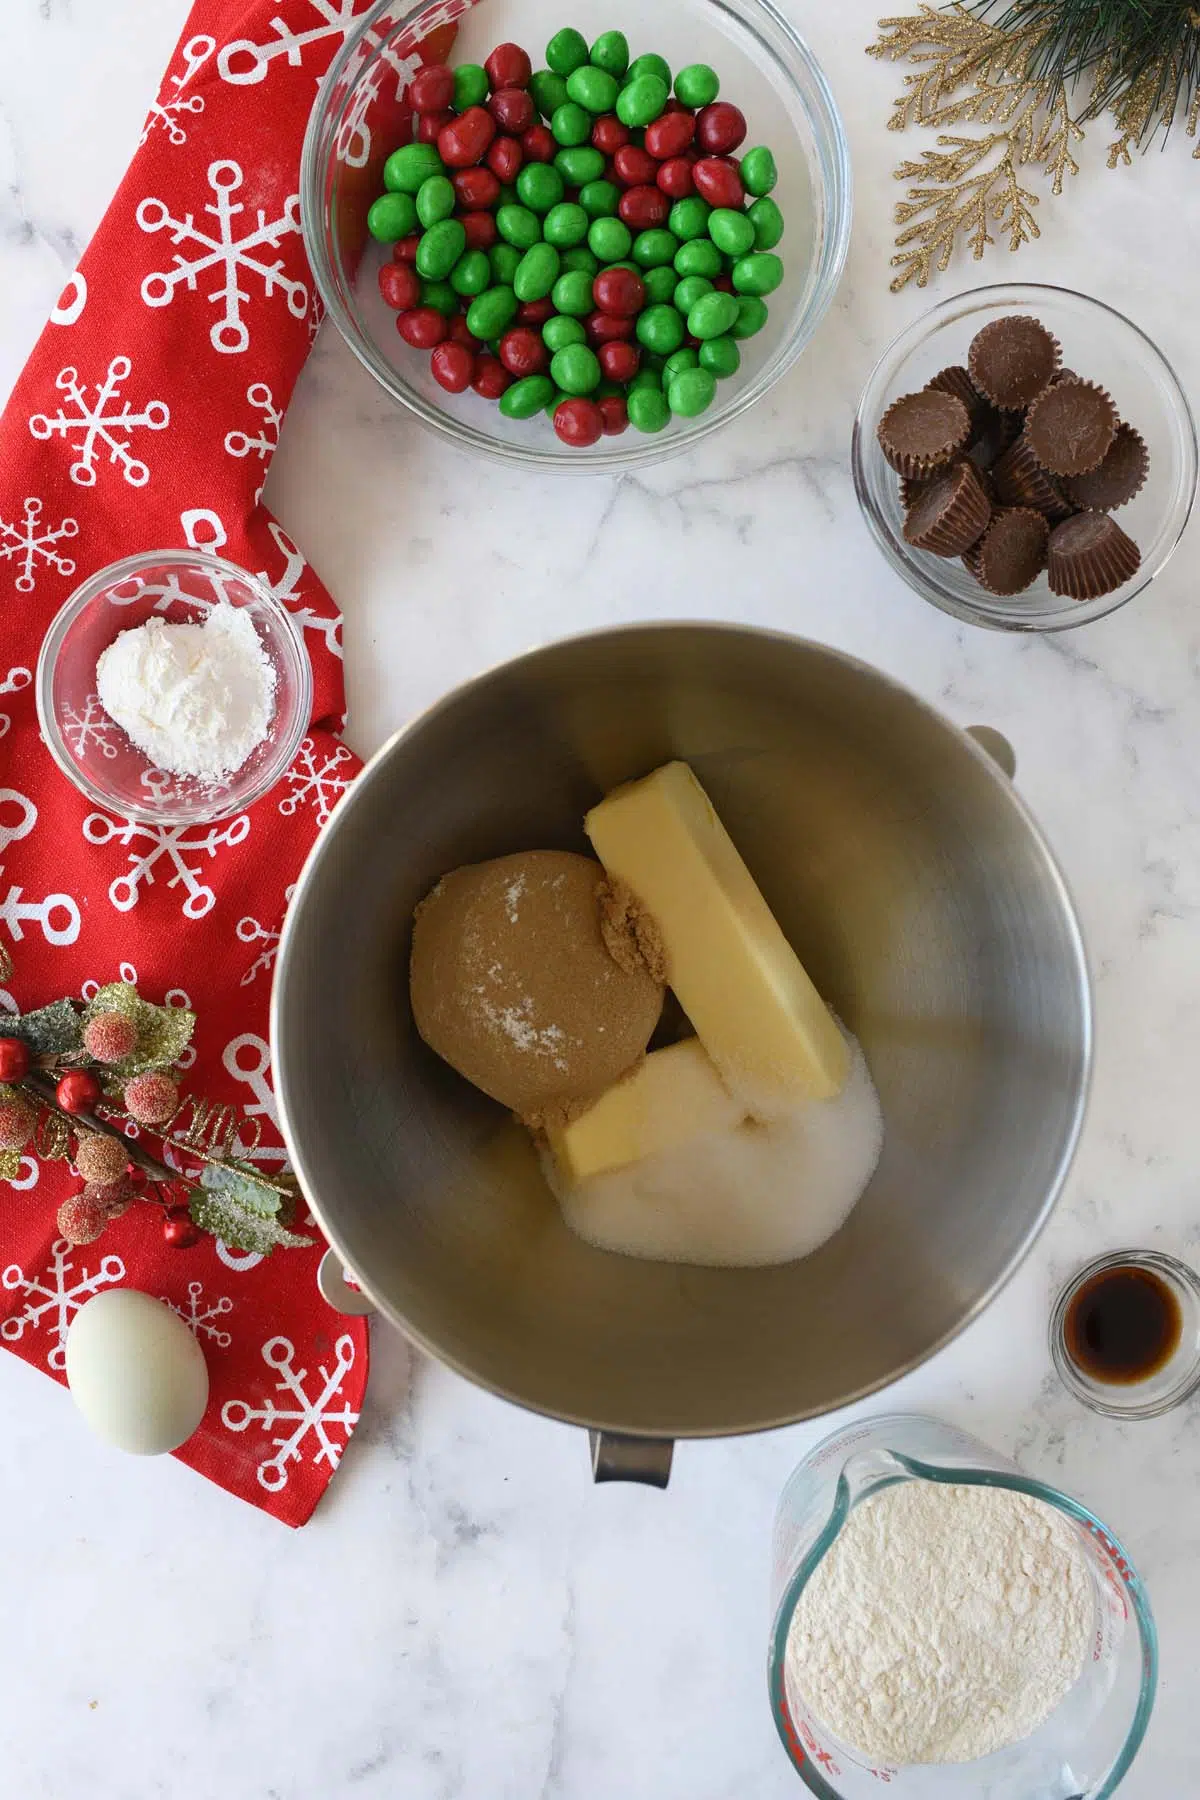
- Prep Dry Ingredients: Whisk together the flour, baking soda, salt, and cornstarch in a medium bowl.
- Cream Wet Ingredients: Beat the butter and both sugars in a large bowl until light and fluffy. Add the egg and vanilla; mix until just combined.
- Mix Dough: Gradually add the dry ingredients to the wet mixture on low speed. Stop mixing as soon as the flour streaks disappear.
- Add Mix-ins: Gently fold in the Peanut M&Ms, and REESE’S Peanut Butter Cups.
- Scoop & Chill: Scoop cookie dough balls and place on a lined baking sheet. Chill for 30 minutes for best results (optional, but recommended).
- Bake: Bake at 350F. for 10-12 minutes, or until edges are set and centers are slightly soft.
- Cool: Let cool on the baking sheet for 5 minutes before moving to a wire rack to cool completely.
FAQS
Since these are “No-Chill Needed,” can I skip that step?
Yes, you can skip the chilling step entirely. These cookies are specifically formulated to hold their shape and stay thick without chilling. You can scoop the dough and bake it immediately. The chilling note is an optional, traditional step, but not necessary for this specific recipe’s success.
The no-spread characteristic is primarily achieved through the specific ingredients and mixing method:
- Cornstarch: This key ingredient helps thicken the dough, inhibits gluten development, and absorbs moisture, all of which contribute to a sturdy, no-spread structure.
- Creaming: Properly creaming the butter and sugars (incorporating air) creates a light structure that is less likely to collapse.
- Ingredient Ratio: The precise balance of flour, fat, and sugar is what allows the cookie to set quickly at 350F. without excessive spread.
What happens if I overmix the dough?
Overmixing the dough after adding the flour develops the gluten, which can make the cookies tough, dry, and potentially prone to spreading.2 Stop mixing immediately once the last flour streaks disappear.
Can I use different candies or other mix-ins?
Yes! You can substitute other stable, chopped candies or mix-ins (like holiday traditional M&Ms, toffee, or chocolate chips). Just ensure you fold them in gently at the end to avoid crushing them or overmixing the dough. You can add two cups of mix-ins to this recipe.
How will I know exactly when they are done?
Look for these signs:
- The edges are set and look dry or slightly golden brown.
- The centers are still slightly soft, puffy, and appear underbaked.Pulling them out when the centers are still soft is necessary, as they will continue to set on the hot baking sheet.
Why is the 5-minute cool on the baking sheet necessary?
This is a crucial step! The hot baking sheet continues to cook the soft center of the cookie and allows its structure to solidify. If you move them too early, they may fall apart or collapse.
Can I freeze the dough?
Yes. Scoop the dough balls, place them on a lined sheet tray, and freeze until solid. Transfer the frozen dough balls to a freezer bag and store for up to 3 months. Bake the frozen dough, adding 2–4 minutes to the bake time (12-16 minutes total).
Storing Christmas Cookies
1. Storing Baked Cookies (Short-Term)
To keep the cookies fresh, soft, and chewy after baking:
- Ensure Complete Cooling: Make sure the cookies are fully cooled on a wire rack before storing. Storing warm cookies will create condensation and make them soggy.
- Use an Airtight Container: Place the cooled cookies in an airtight container.
- Add a Slice of Bread (Optional): To help them stay soft, you can place a half slice of plain white bread in the container with the cookies. The cookies will absorb moisture from the bread. Replace the slice every day or two.
- Shelf Life: Stored properly at room temperature, the cookies will stay fresh for 5 to 7 days.
2. Storing Baked Cookies (Long-Term/Freezing)
For longer storage, you can freeze the baked cookies:
- Wrap: Place the fully cooled cookies in a single layer in an airtight freezer-safe container, or wrap them tightly in plastic wrap followed by a layer of aluminum foil.
- Shelf Life: They will keep well in the freezer for up to 2–3 months.
- Thawing: Thaw the cookies overnight in the refrigerator or on the counter in their container to prevent condensation.
3. Storing Unbaked Dough (Freezing)
Freezing the dough is the best way to have fresh cookies ready to bake at any time:
- Scoop: Follow the instructions to scoop the large dough balls and place them on a parchment-lined baking sheet.
- Flash Freeze: Place the entire baking sheet in the freezer until the dough balls are solid (about 1-2 hours).
- Transfer: Once solid, transfer the dough balls into a heavy-duty, zip-top freezer bag or airtight container.
- Shelf Life: The dough will keep in the freezer for up to 3 months.
- Baking from Frozen: When ready to bake, place the frozen dough balls on a lined baking sheet and bake as directed, adding 2–4 minutes to the baking time (check
More Christmas Cookies to Try Today
- Thick No-Chill Chocolate Chip Cookies
- No Chill Christmas Cookies
- Cake Mix Christmas Cookies
- Christmas Peanut Butter Cookies
- Vanilla Pudding Christmas Cookies

No-Spread Christmas Candy Cookies
Equipment
- Stand Mixer
- cookie scoop
- Rubber Spatula
- Measuring cups and spoons
- 2 medium baking sheets
- parchment paper
- Oven adjusted to the center rack position
Ingredients
- ¾ cup unsalted butter room temperature
- ¾ cup light brown sugar packed
- ¼ cup granulated sugar
- 1 large egg
- 2 teaspoons vanilla extract
- 2 cups all-purpose flour
- ½ teaspoon salt
- 2 teaspoons cornstarch
- 1 cup mini peanut butter cups remove foil and wrappers, rough chop.
- 10 ounces Holiday Peanut M&MS
Instructions
- Preheat your oven to 350°F. Line baking sheets with parchment paper. This is crucial for easy cleanup and preventing sticking.
- In a large bowl, cream together the room temperature unsalted butter, light brown sugar, and granulated sugar until light and fluffy.Beat in the egg and vanilla extract until fully incorporated. The mixture should look creamy.
- In a separate medium bowl, whisk together the all-purpose flour, salt, and cornstarch. Make sure there are no lumps.
- Gradually add the dry ingredients to the wet ingredients, mixing on low speed. Be careful not to overmix! Overmixing can lead to tough cookies.
- Gently fold in the candies until they're evenly distributed throughout the dough.
- For larger cookies, use a 2-ounce scoop, for standard, use a tablespoon sized scoop.
- Place the dough balls onto your prepared baking sheet, leaving at least 2 inches between each cookie. You'll likely only fit 9 cookies per standard baking sheet. Gently press down each cookie ball.
- Bake for 10-12 minutes, or until the edges are golden brown and the centers are still soft and slightly underbaked.
- Let the cookies cool on the baking sheet for 5 minutes before transferring them to a wire rack to cool completely.
- Repeat baking steps until all cookies are baked, Enjoy!
Leave a Reply